Last month, many of you have sent me questions about Rasberry Pi 4. How to setup without an extra Monitor or Keyboard. So for today's tutorial, I will teach you how to set up a headless mode for raspberry pi 4.
What you will need
There are several models of Raspberry Pi that include the latest one which is Raspberry Pi 400. But for today, we're going to you use the Raspberry Pi 4 Model B with 4GB RAM Starter Kit Pack.
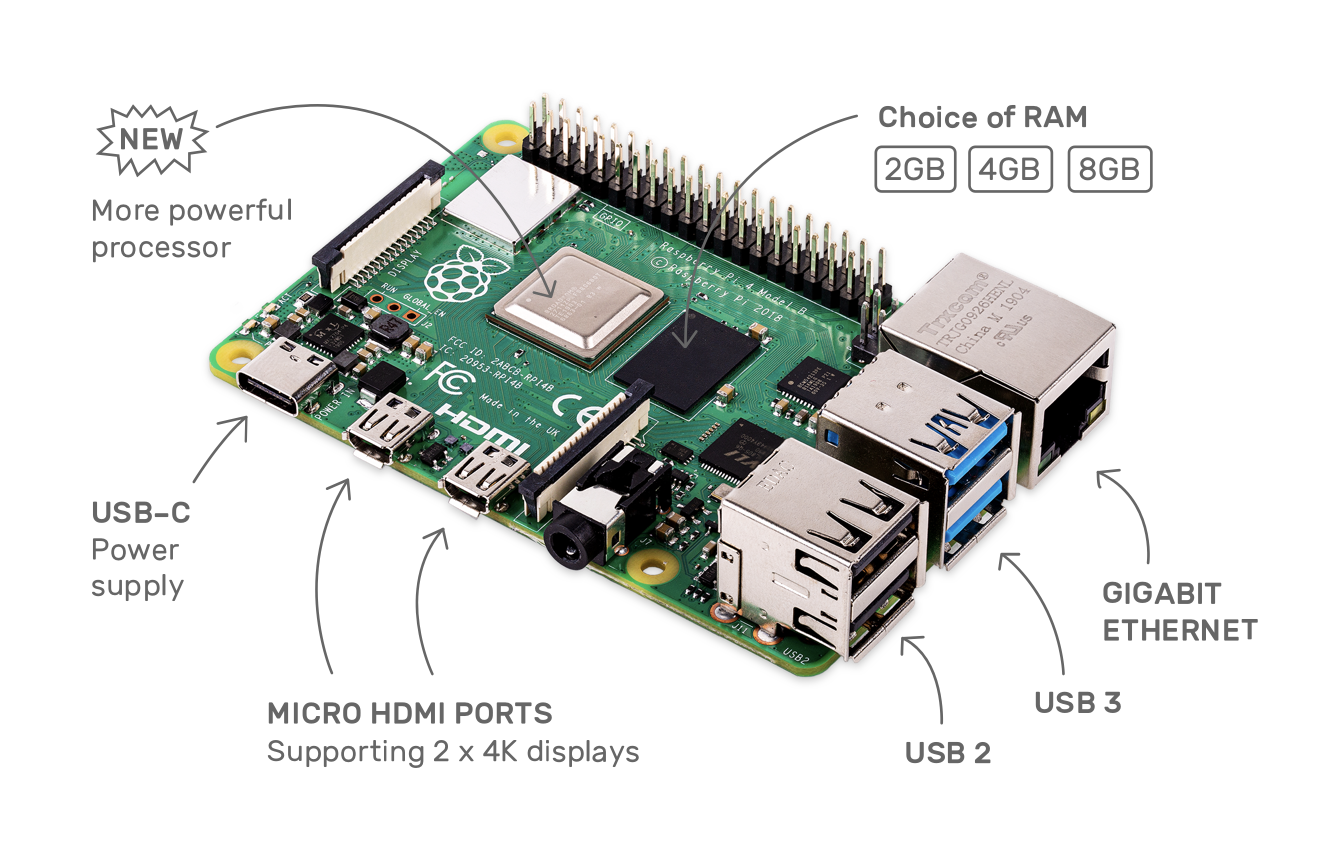
The next thing you need to do is an internet connection and a laptop to flash the raspberry pi operating system into your microSD.
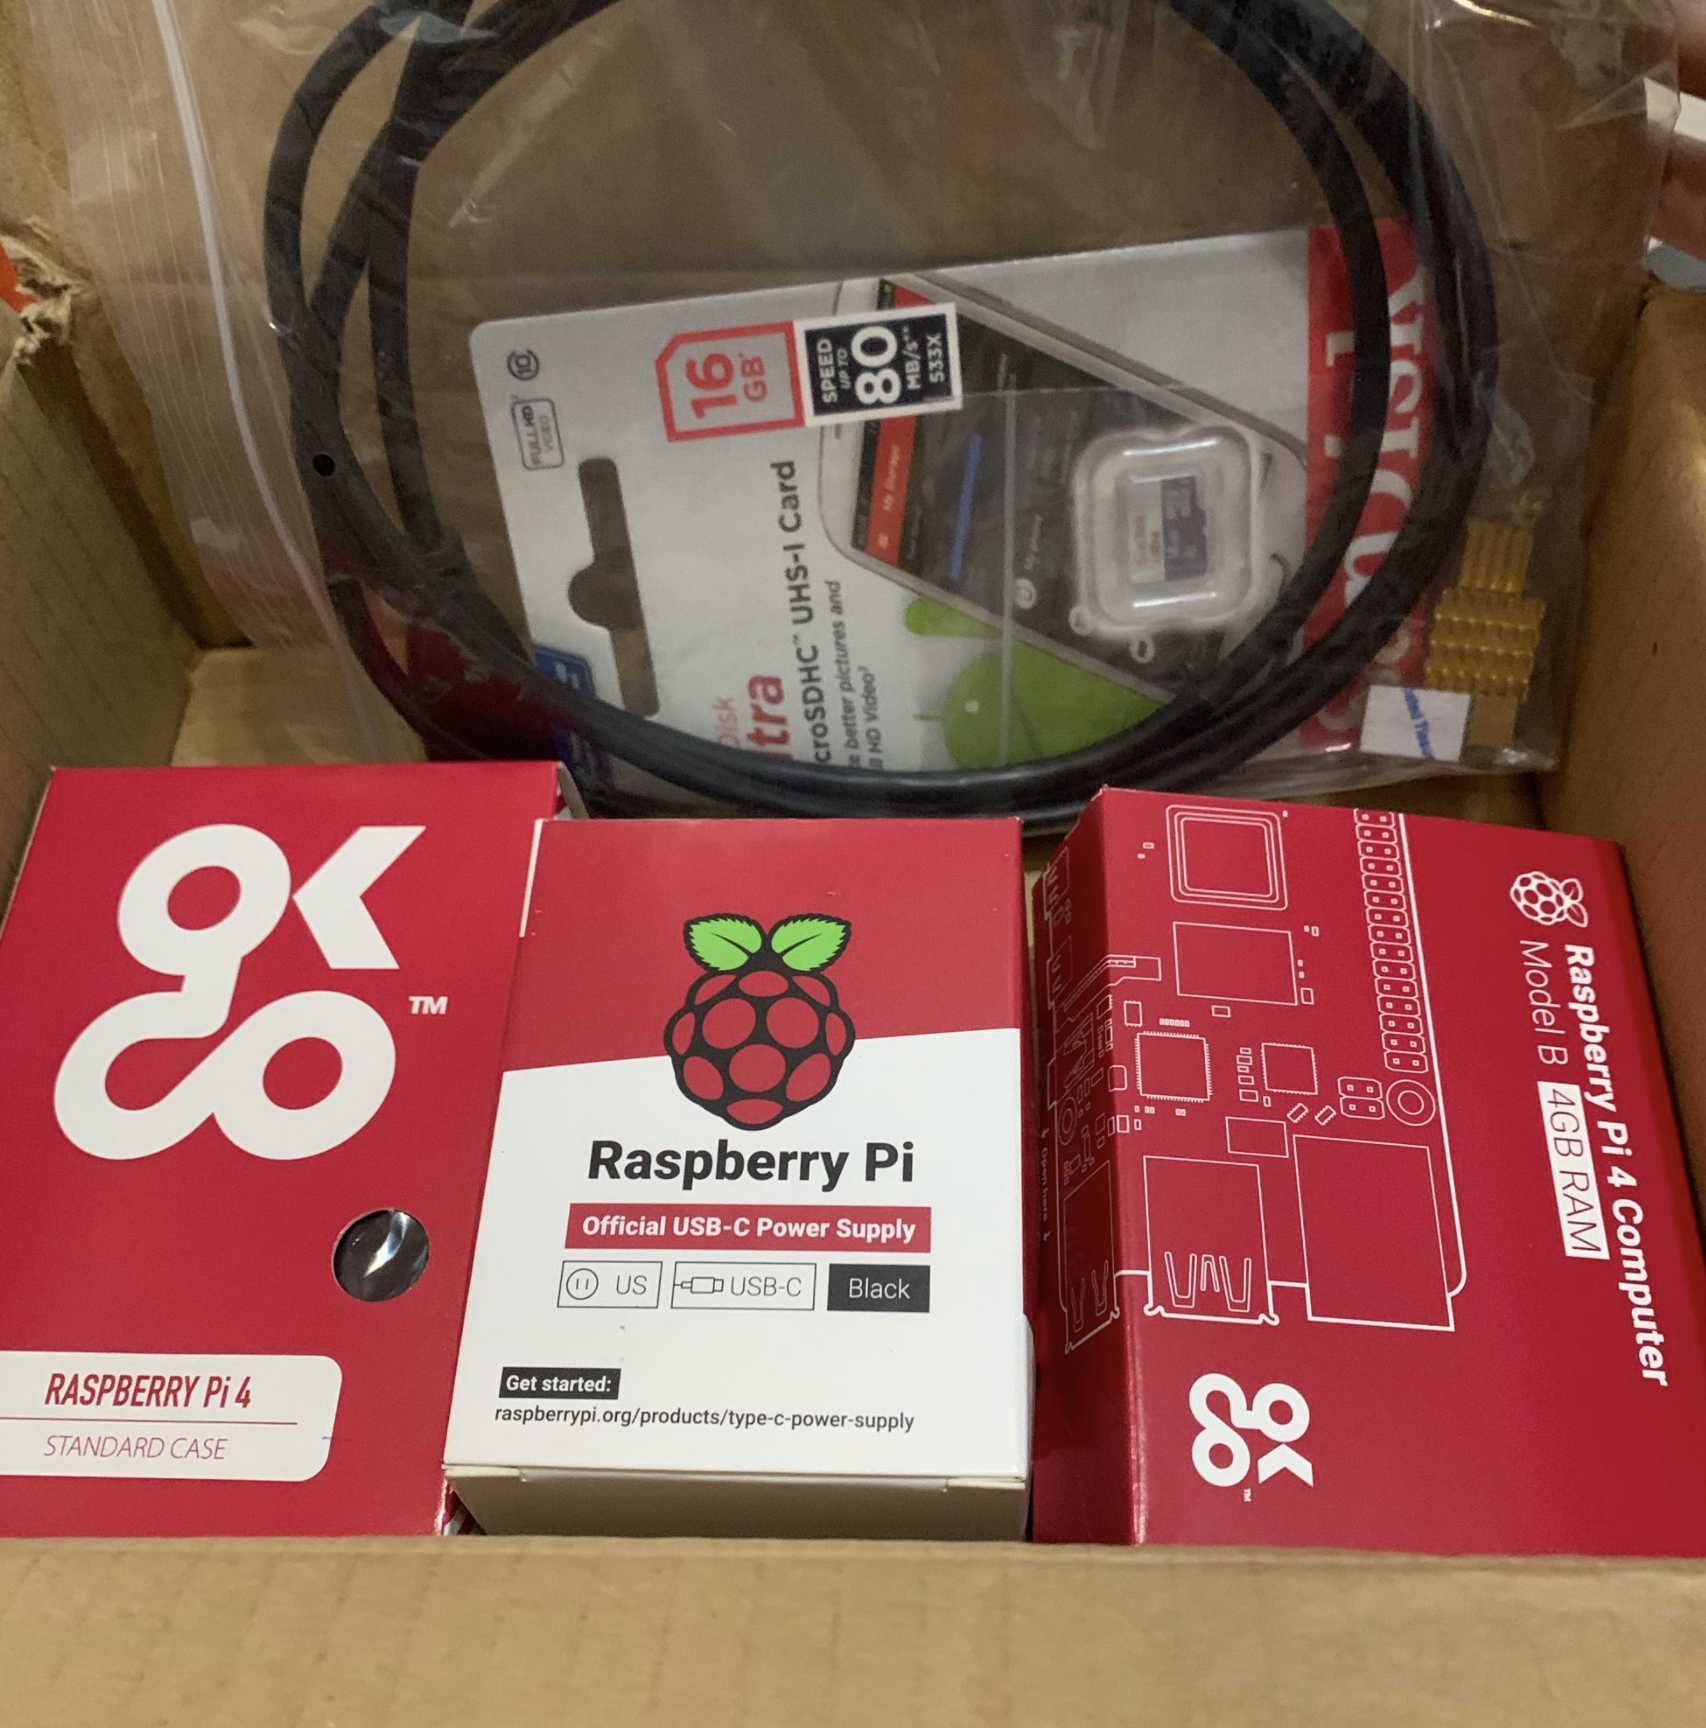
Starter Kit Includes:
- Raspberry Pi 4 Model B 4GB RAM
- Raspberry Pi Official USB-C Power Supply
- Micro HDMI to Standard HDMI 1m Cables
- 16GB Class10 microSD Card ( I bought a separate microSD 128GB Class10 Separately)
- Set of Heatsink
- Raspberry Pi 4 Case Black
Let's Start Pare:
STEP 1: Flashing / Installing Raspberry Pi OS on your microSD Card
There are free tools that you can download to flash Raspberry Pi OS images to SD cards or usb drivers. Just pick one and we're good to go.
BalenaEtcher (Windows / Mac / Linux) - Flash OS images to SD cards & USB drives, safely and easily. You can download it from this link https://www.balena.io/etcher
(Best Choice) Raspberry Pi Imager (Windows / Mac / Ubuntu) - Simpler way to image your microSD card with Raspbian. You can download it from this link https://www.raspberrypi.org/downloads/
STEP 2 - A: Using BalenaEtcher Application
Insert your microSD card into your computer, then open the BalenaEtcher app.
Download the Raspberry Pi OS from this link https://www.raspberrypi.org/downloads/raspberry-pi-os/
And choose from the lists below, As per this tutorial we're using (Raspberry Pi OS (32-bit) with desktop and recommended software)
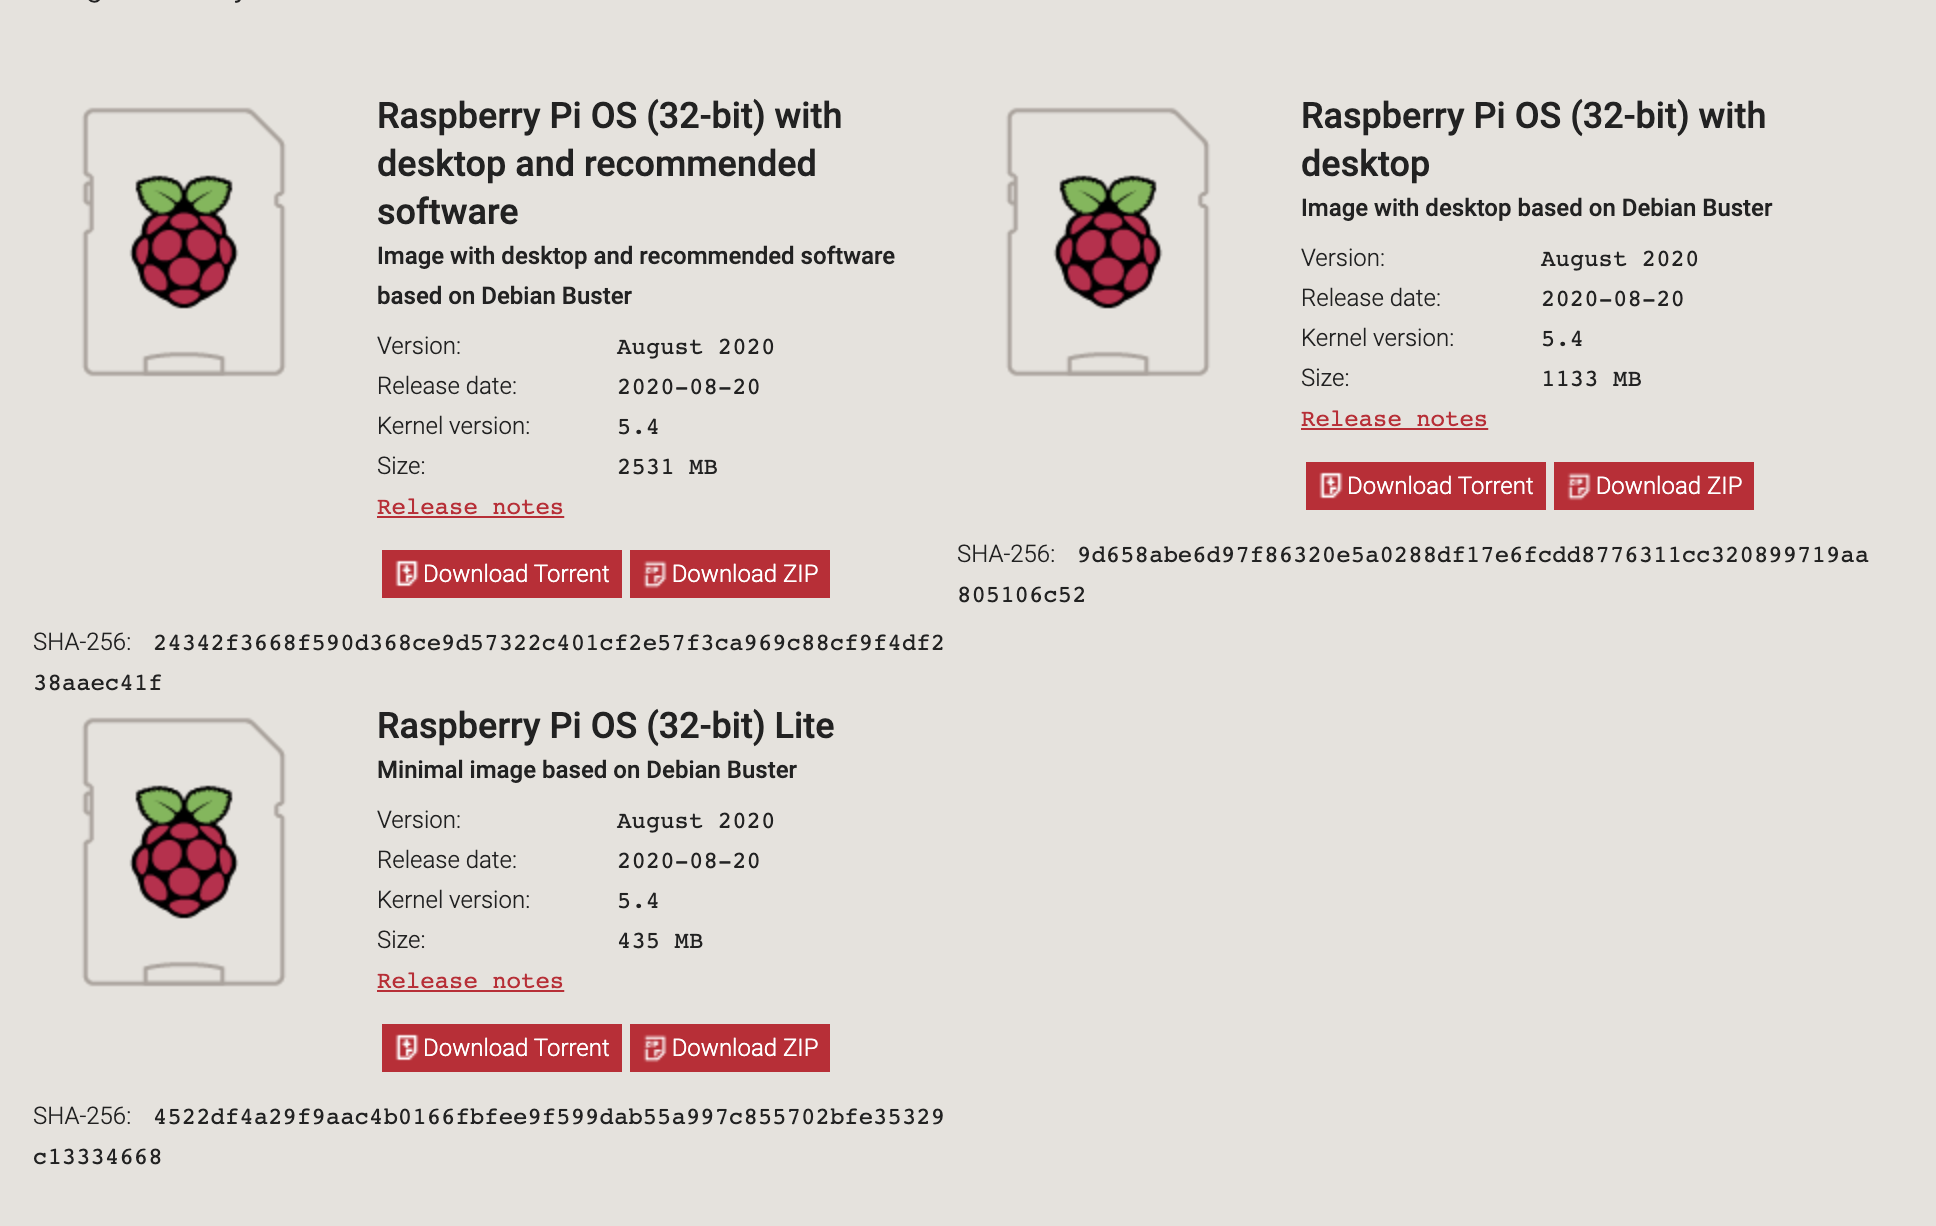
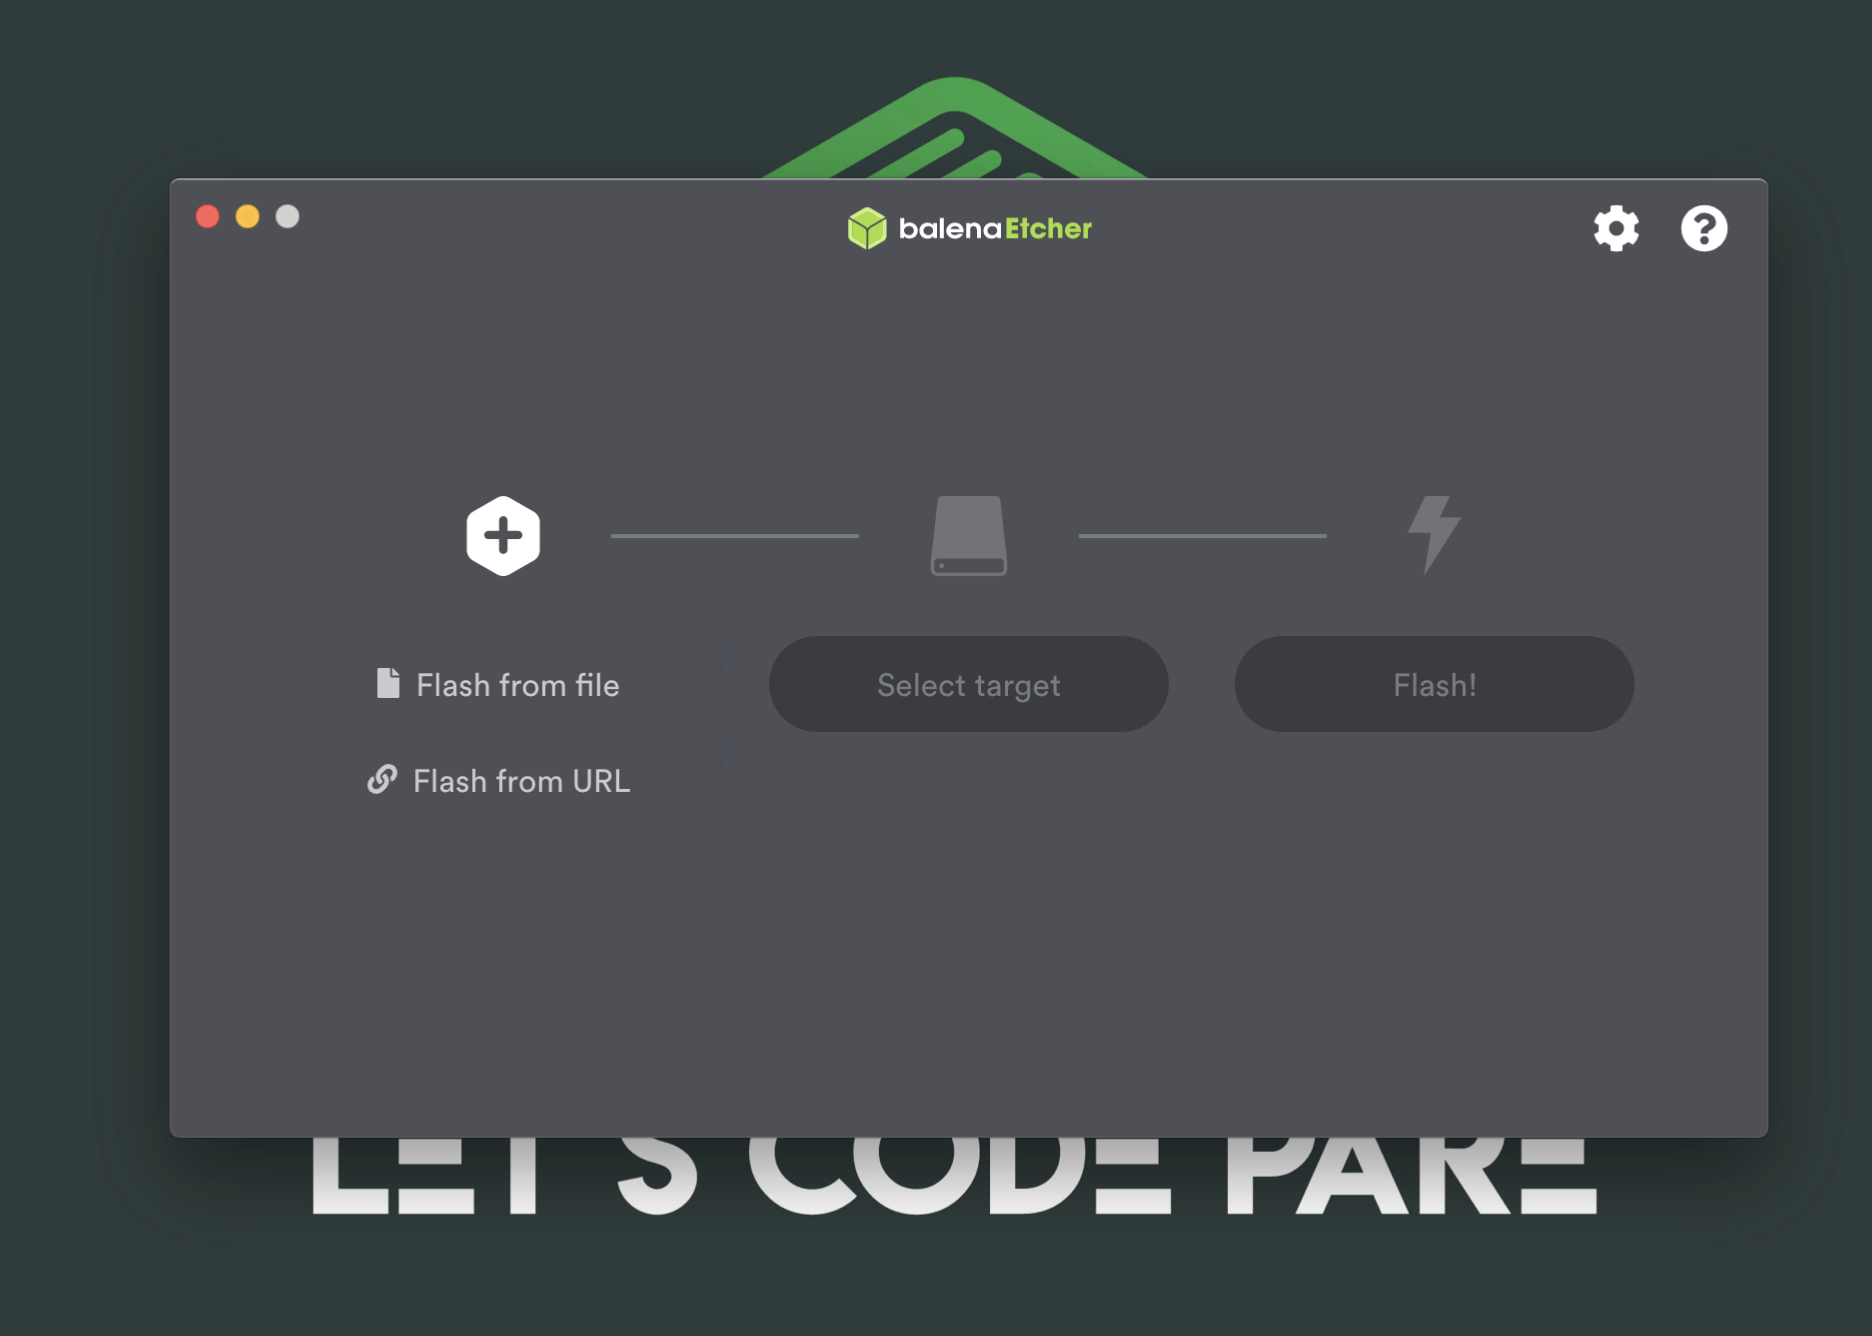
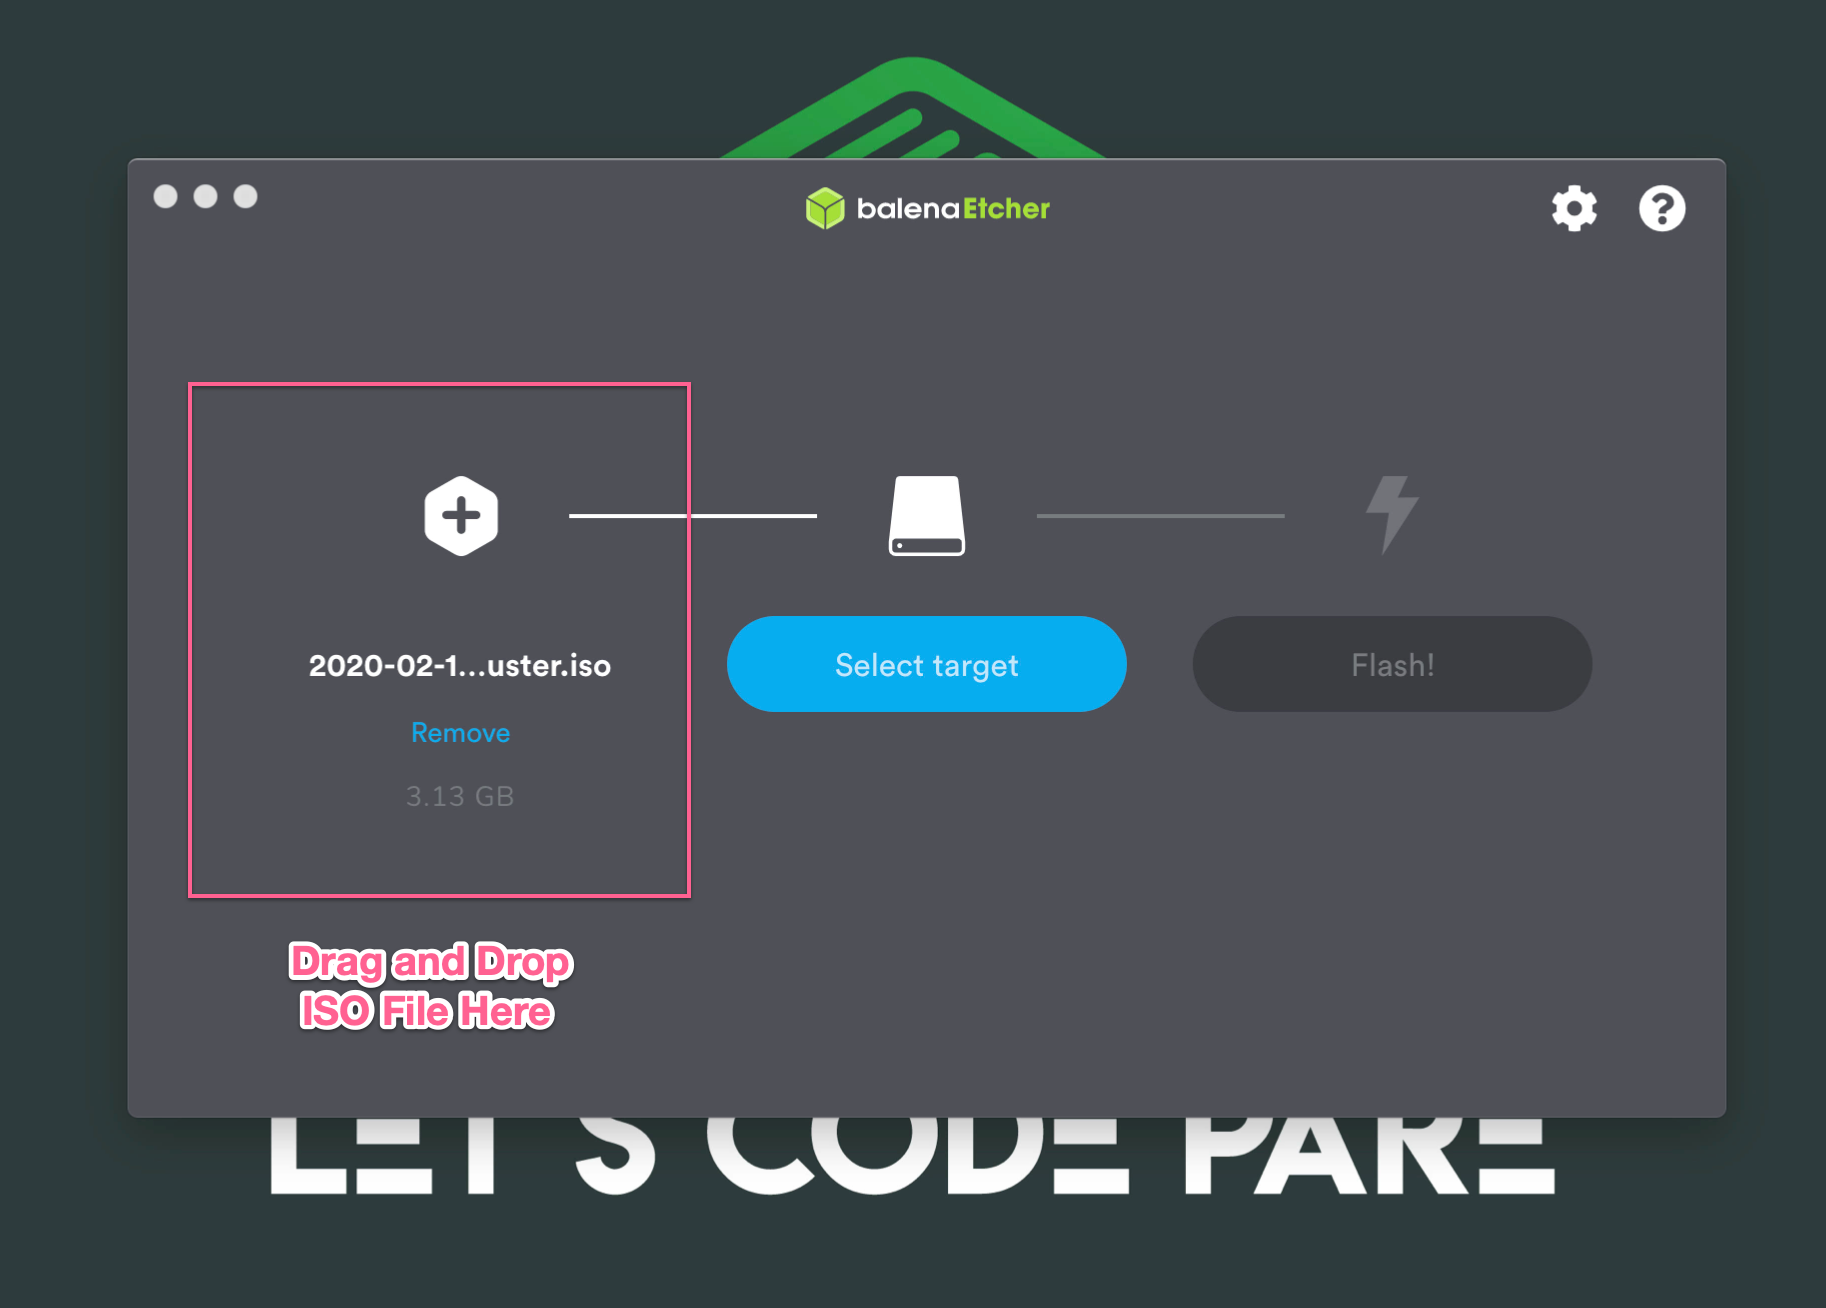
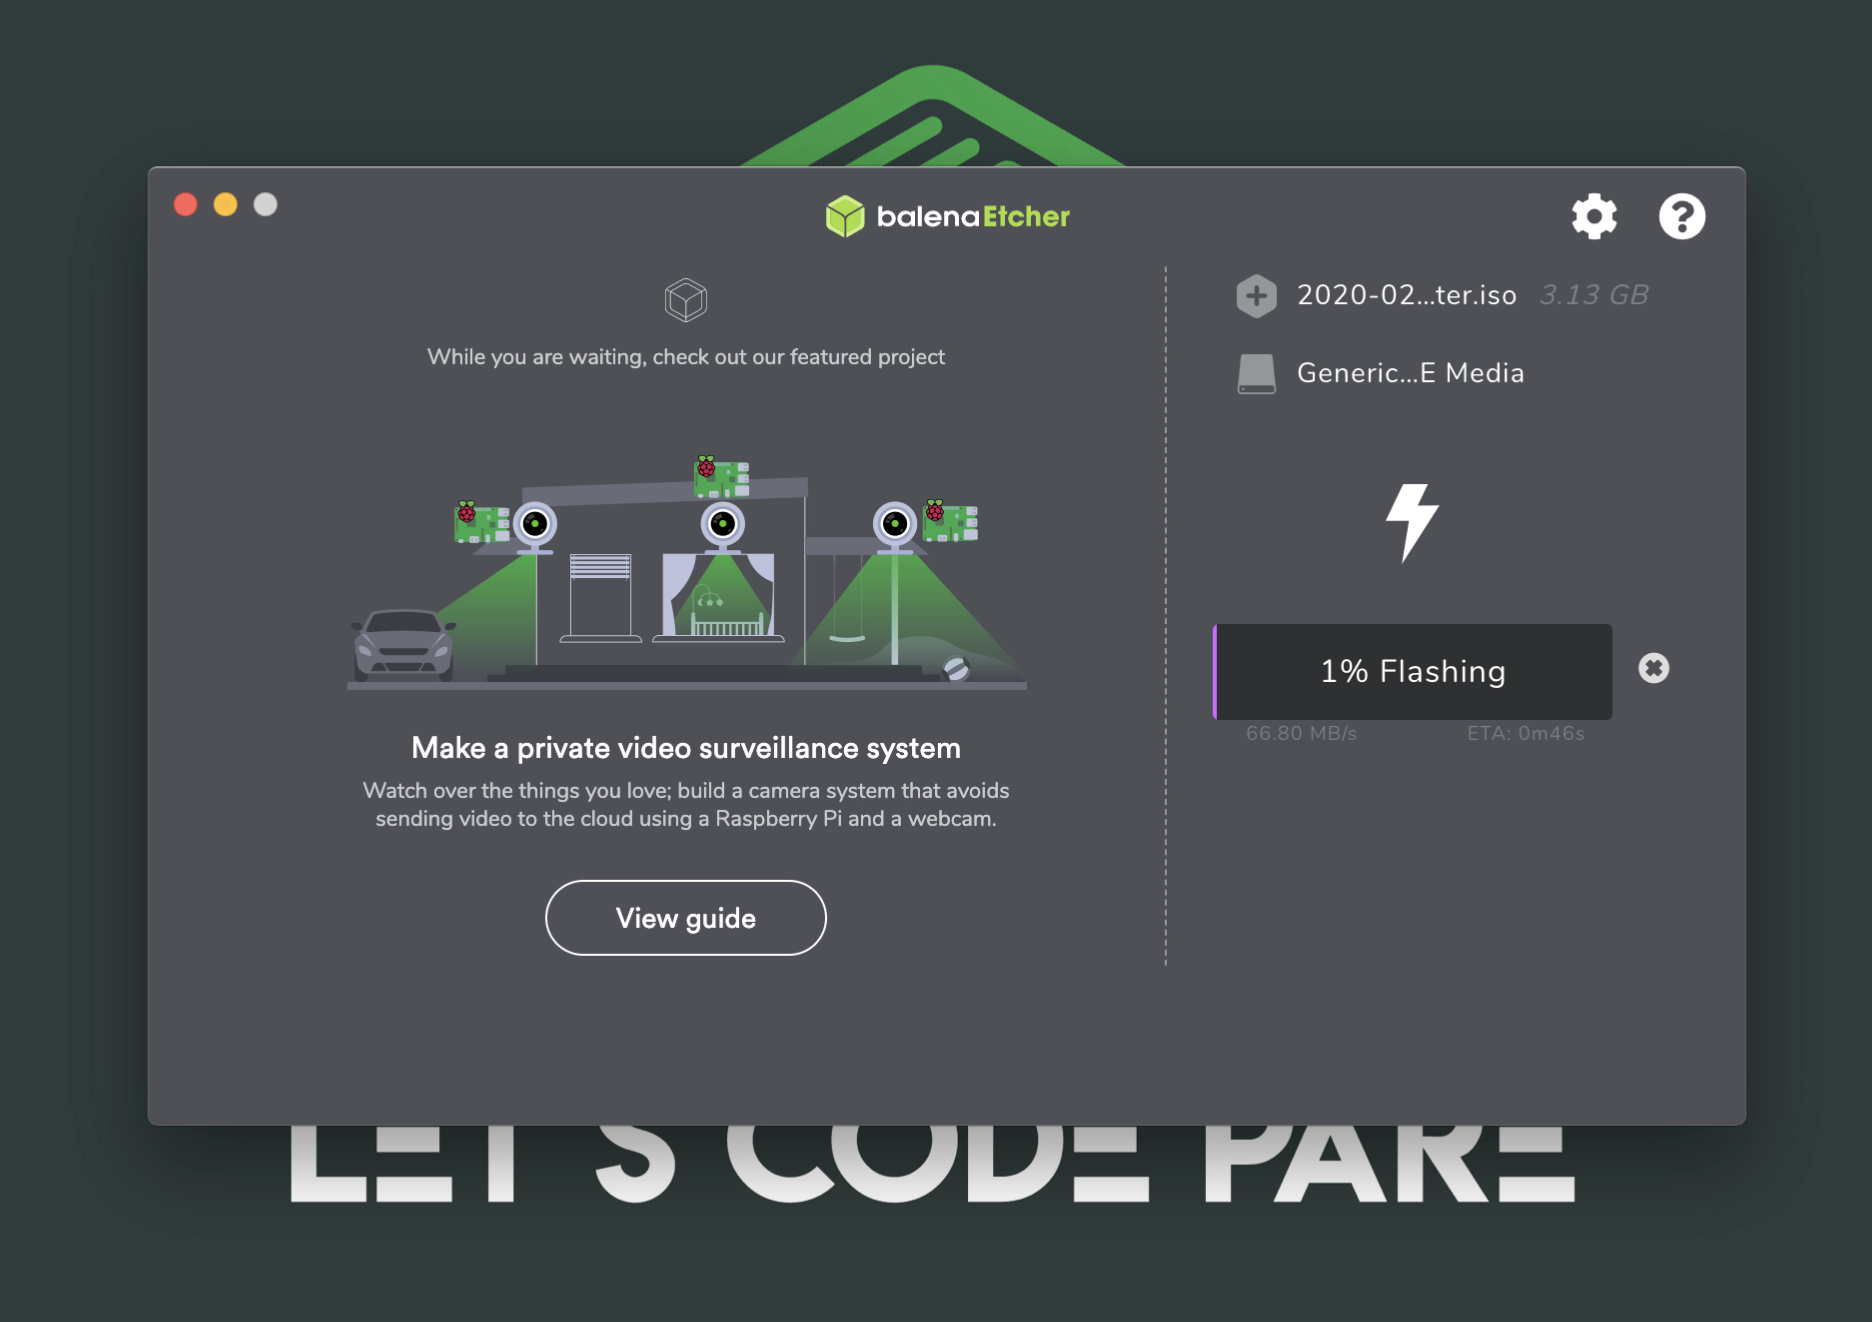
Once the OS was downloaded, open up the etcher applications and drag and drop your .iso file.
Drag and Drop the .iso file that you downloaded a while ago.
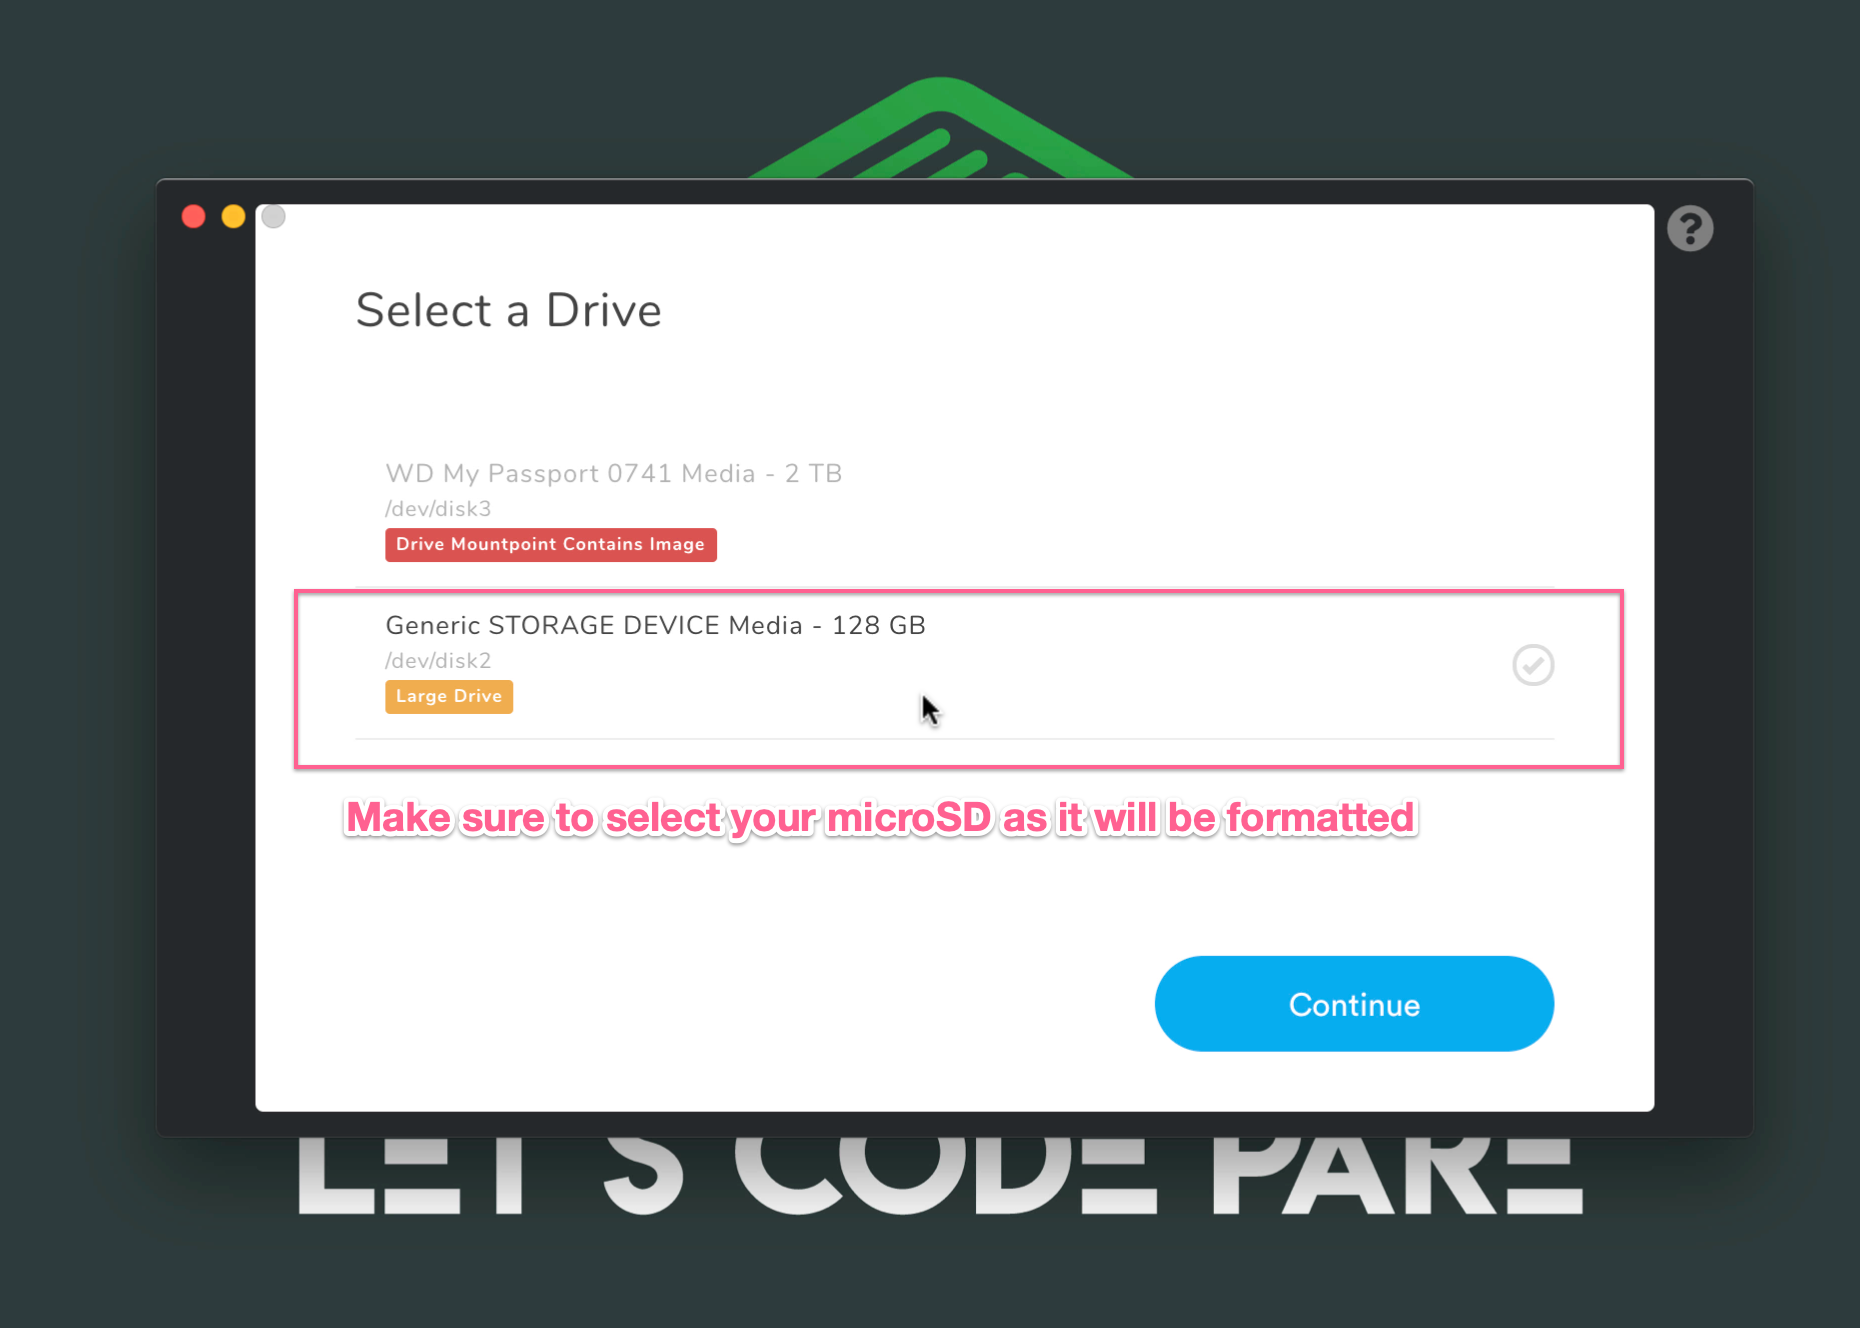
Select Your microSD using the select target button as you can see below:
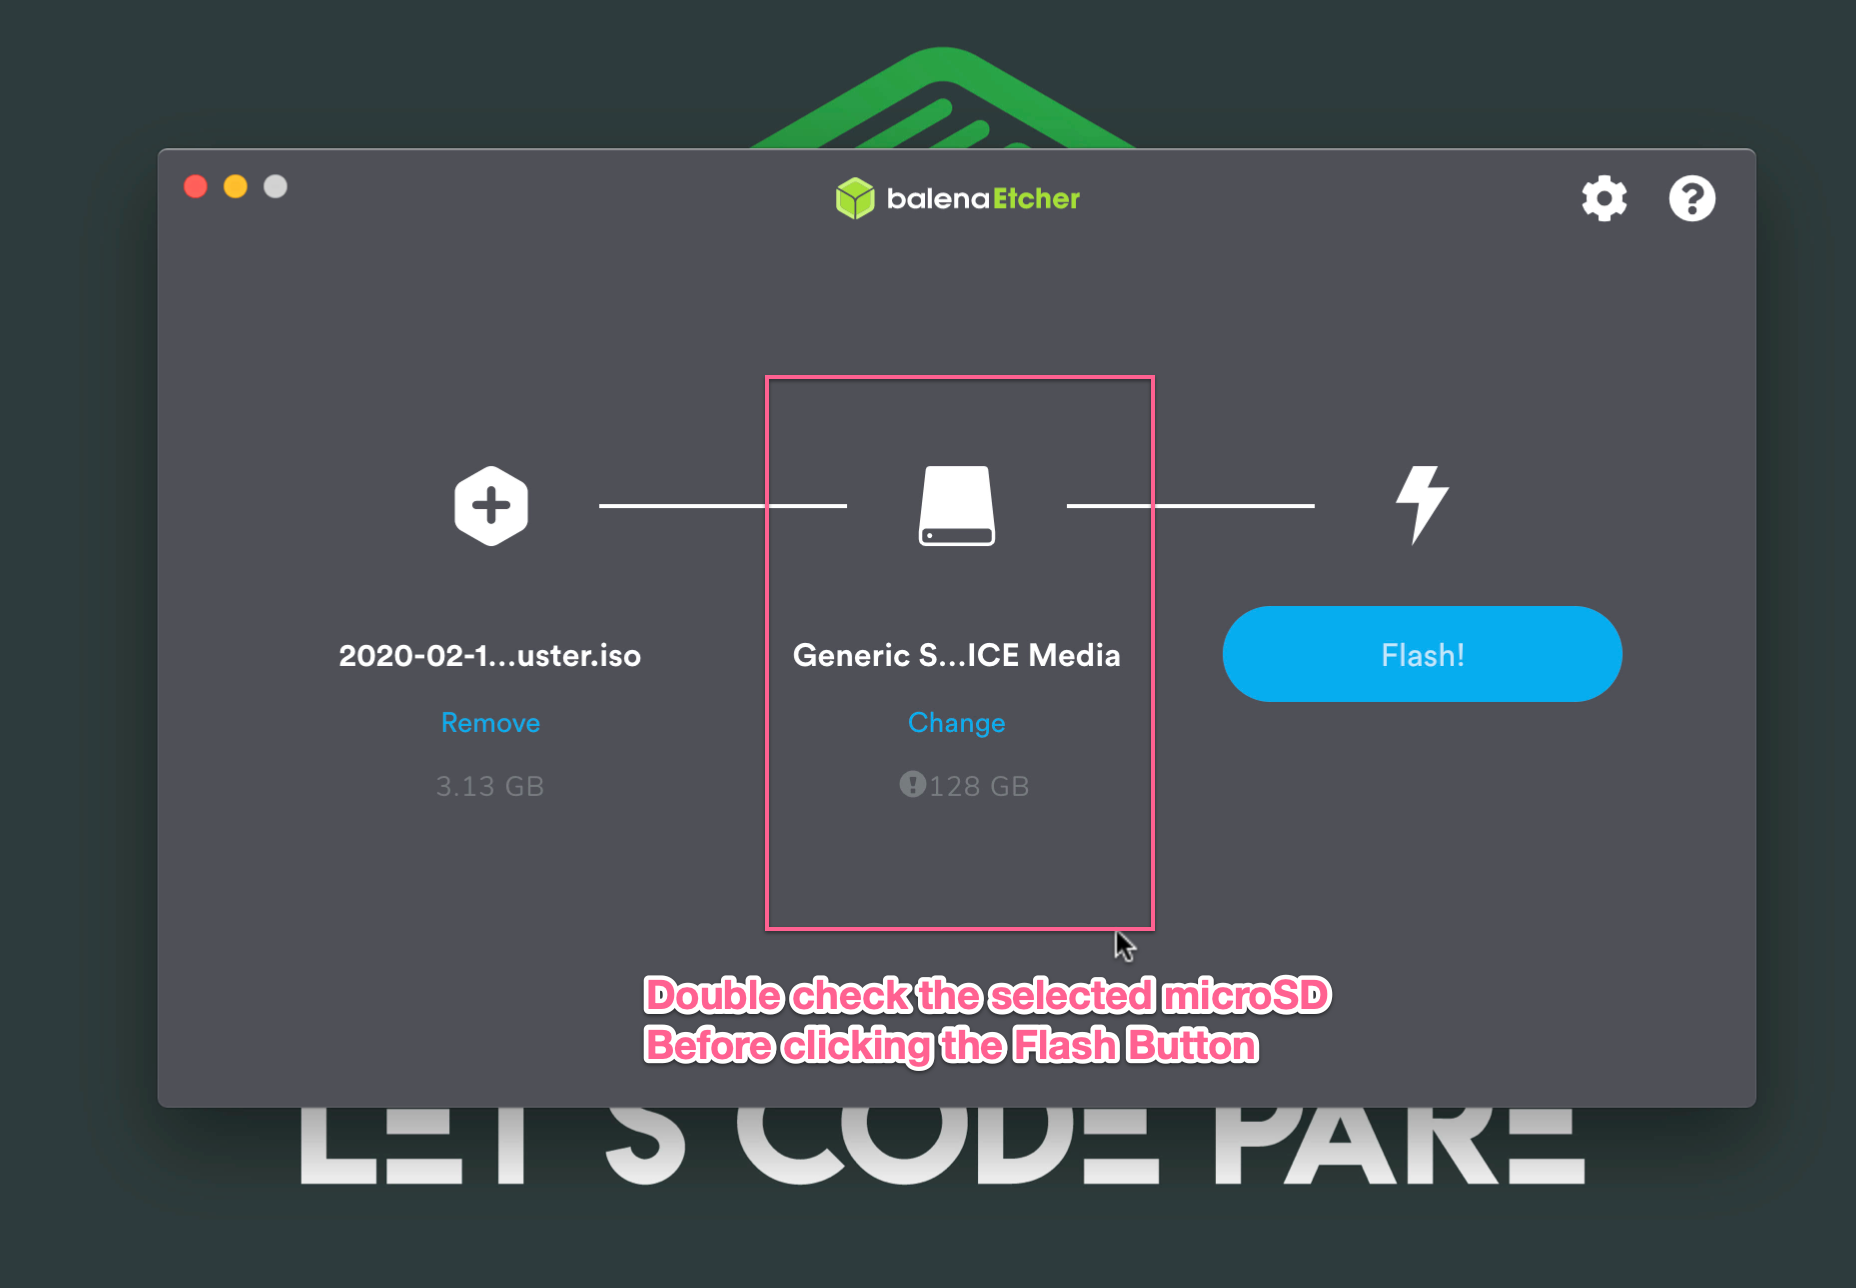
Double check the selected target microSD before clicking the flashing button.
After everything was selected properly, click the Flashing Button and it will start to install the operating system to your microSD in a minute.
Tadaaa!!!, It's done. Make sure you see the Flash Complete screen like what we have below.

STEP 2 - B: Using Raspberry Pi Imager Application ( Best choice )
Insert your microSD card into your computer, then open the Raspberry Pi Imager application.
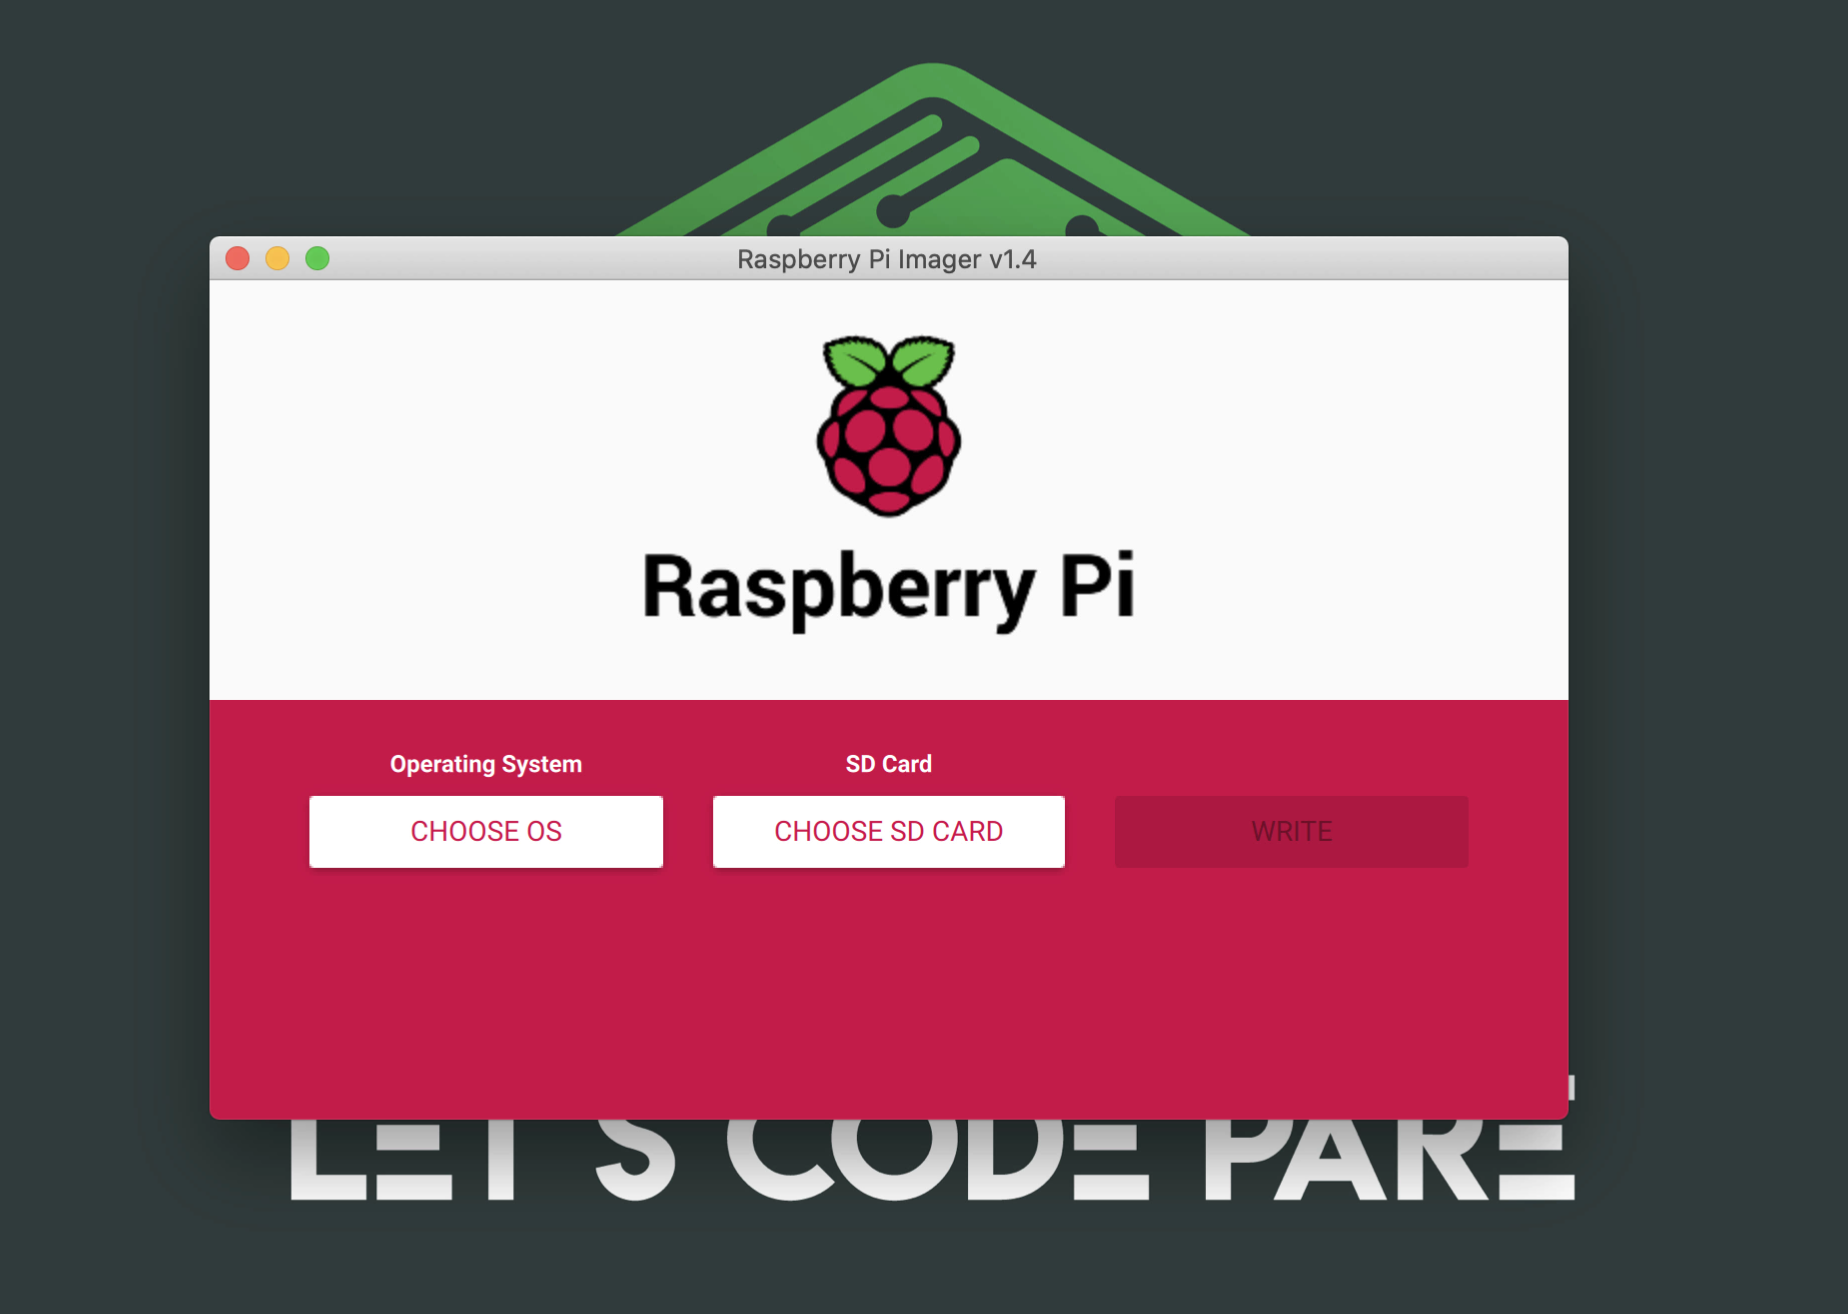
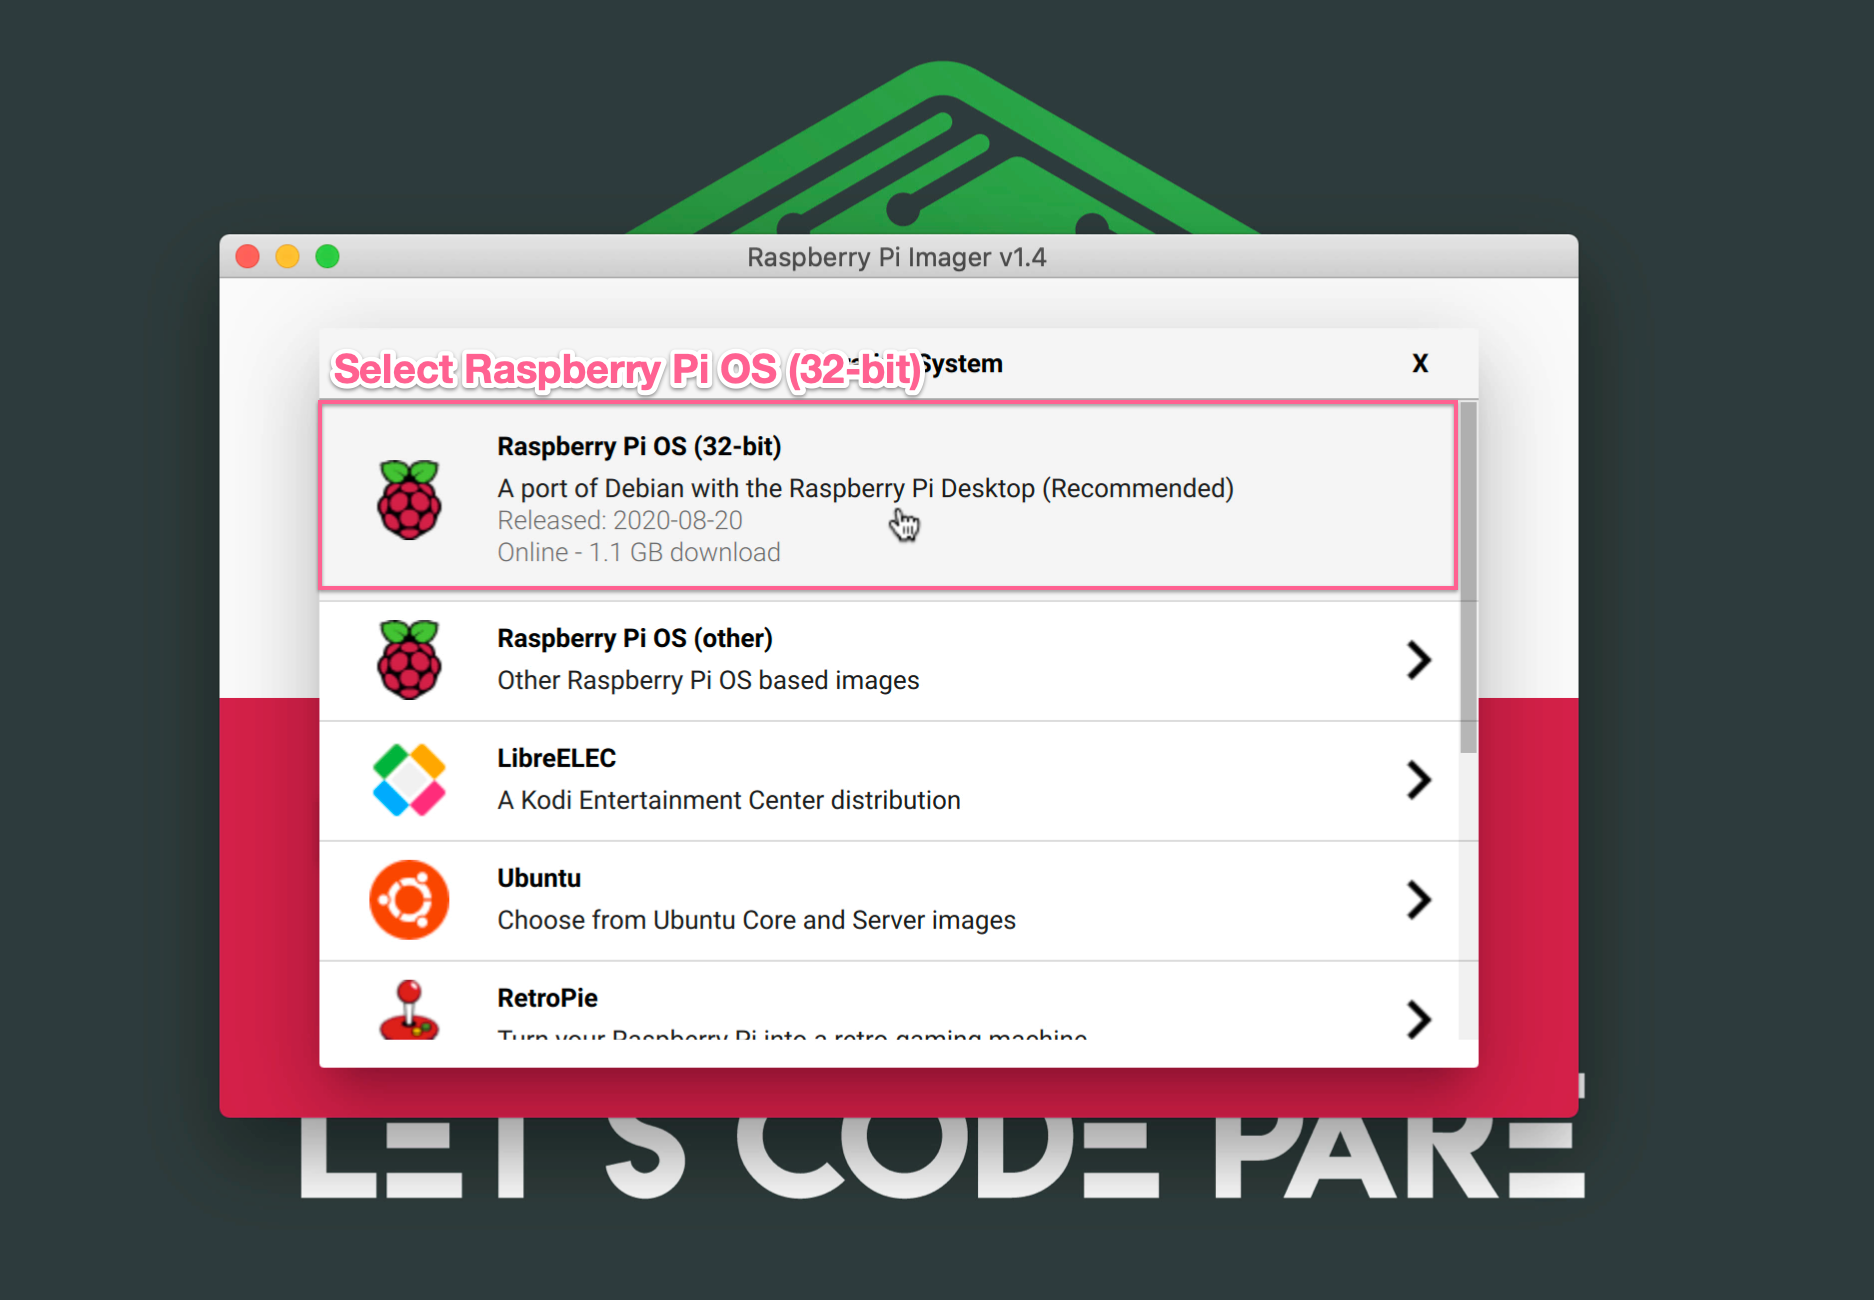
Click the "Choose OS" button and select Raspberry Pi OS (32-bit)
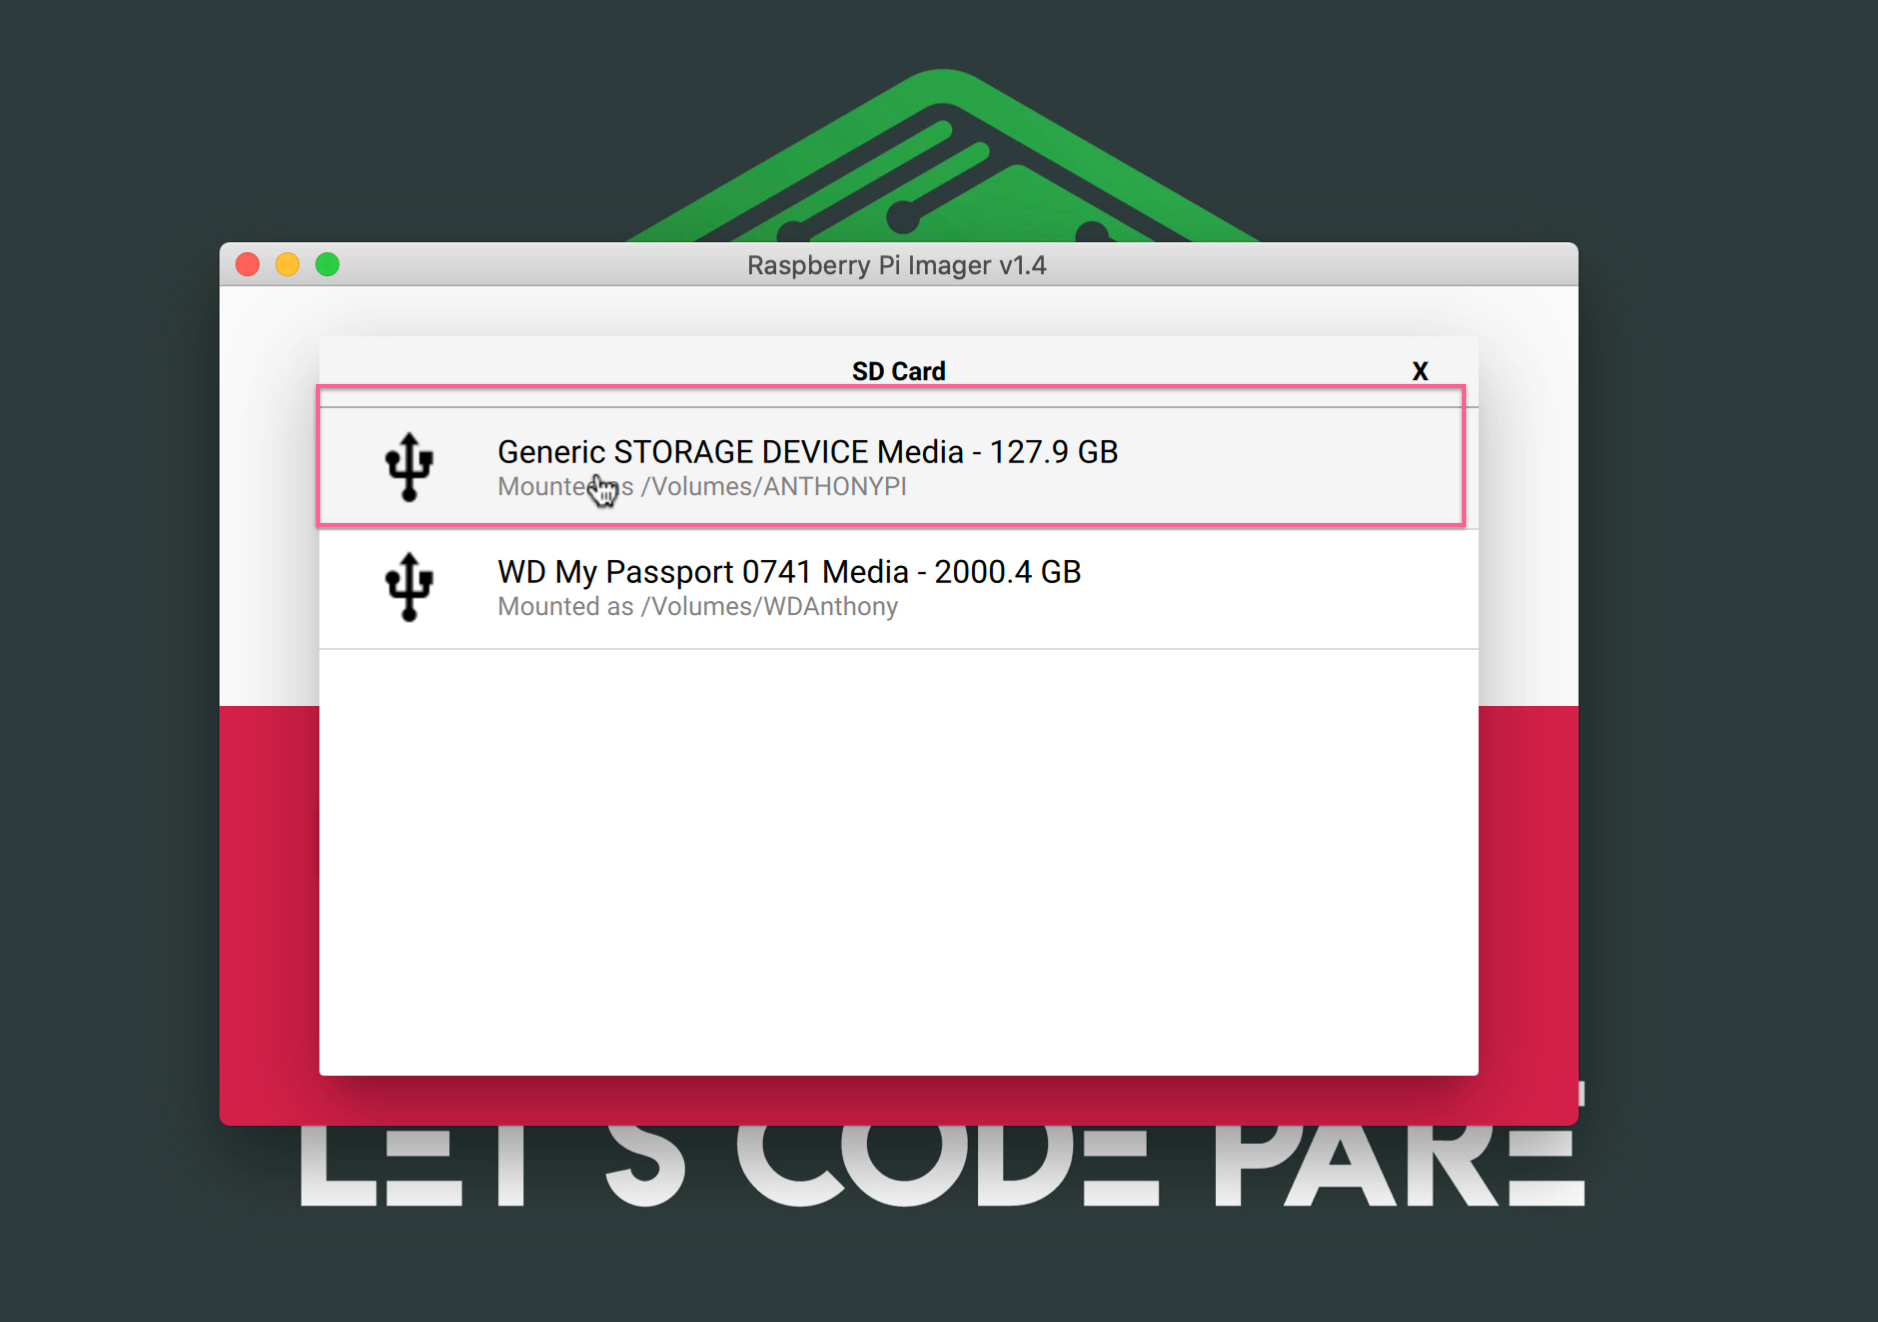
Choose the SD Card you want to use, make sure you double check the one that you selected.
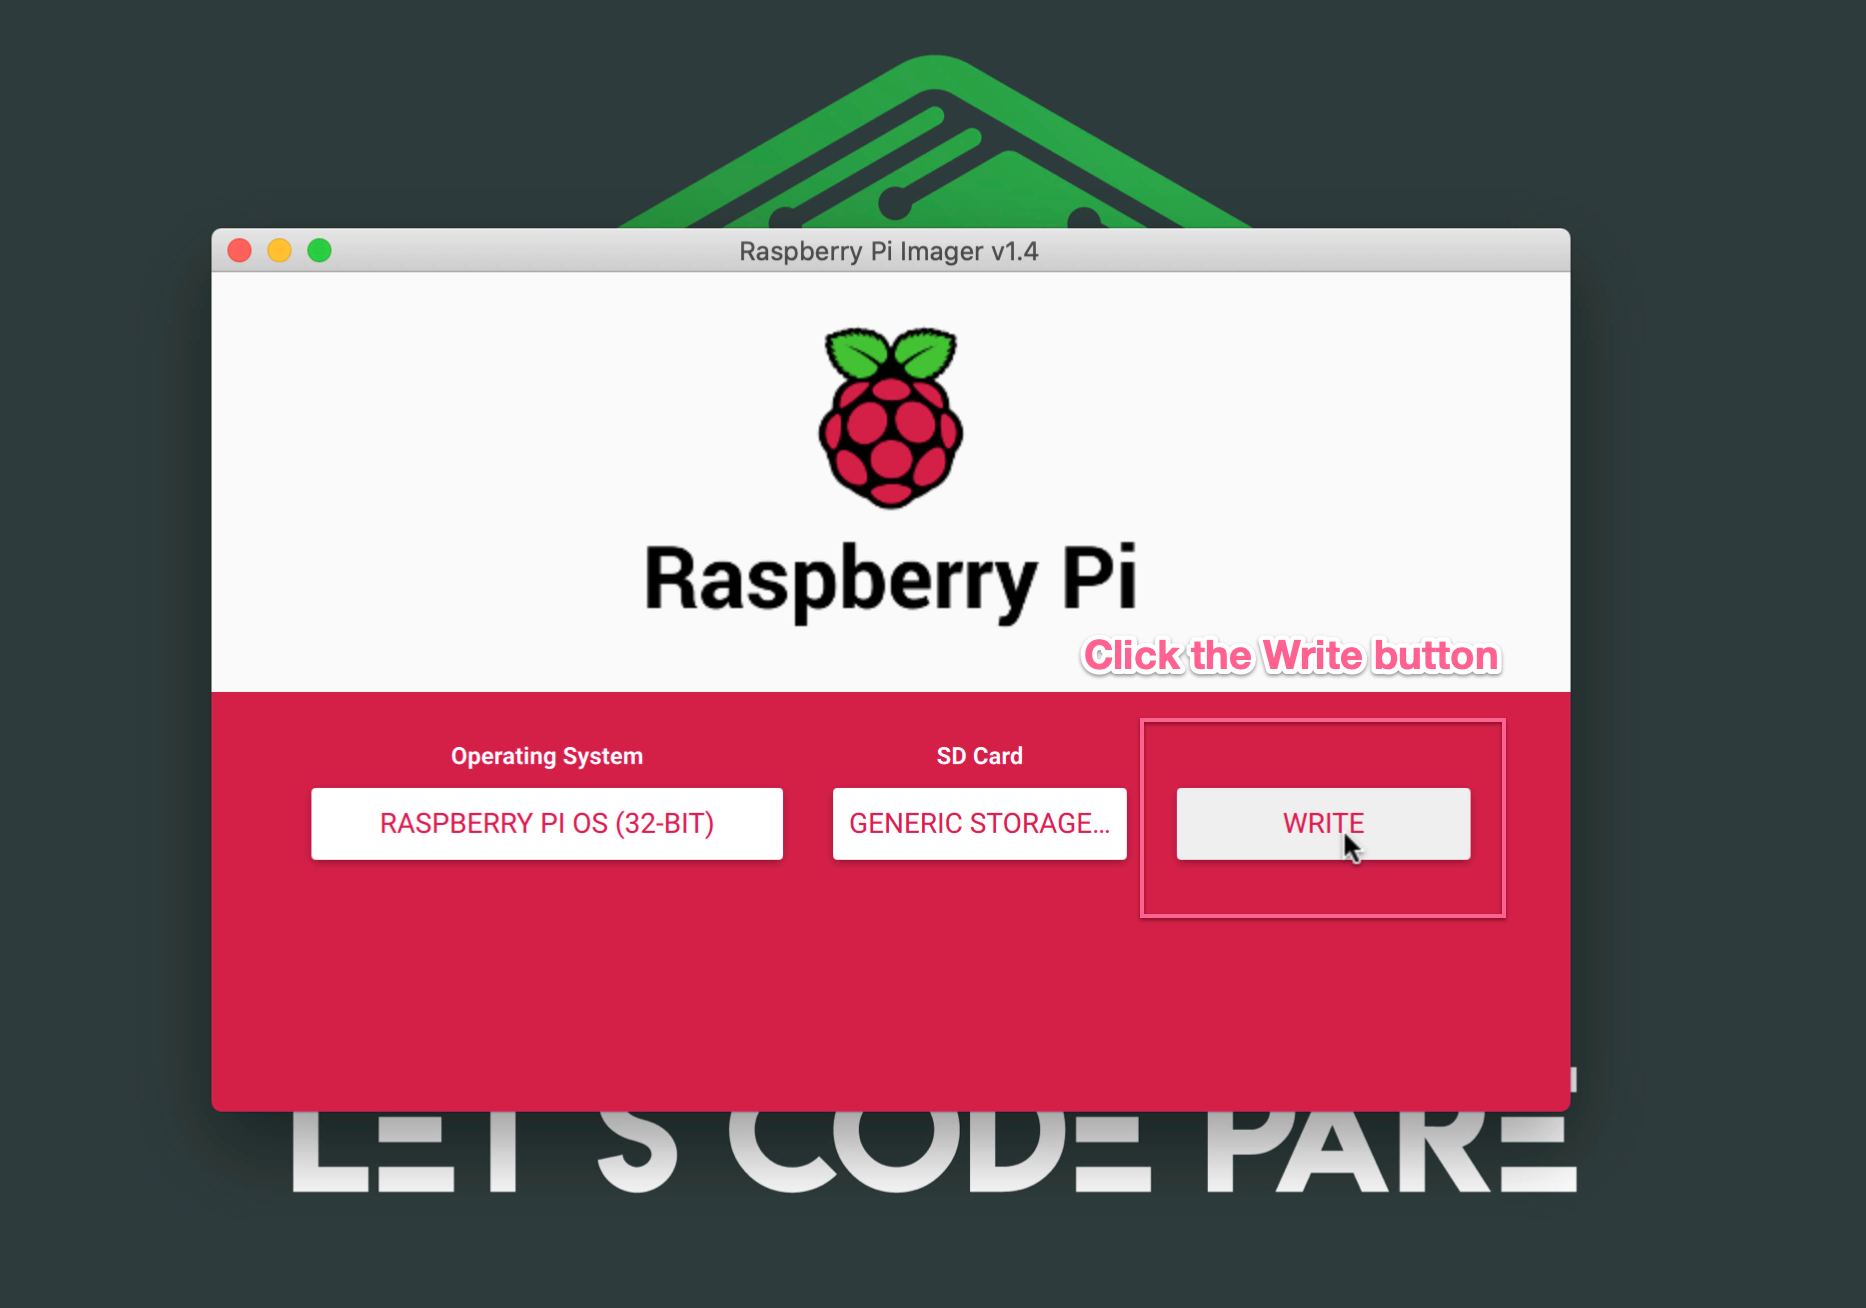
Once everything is selected, click the "Write" button to start flashing the microSD
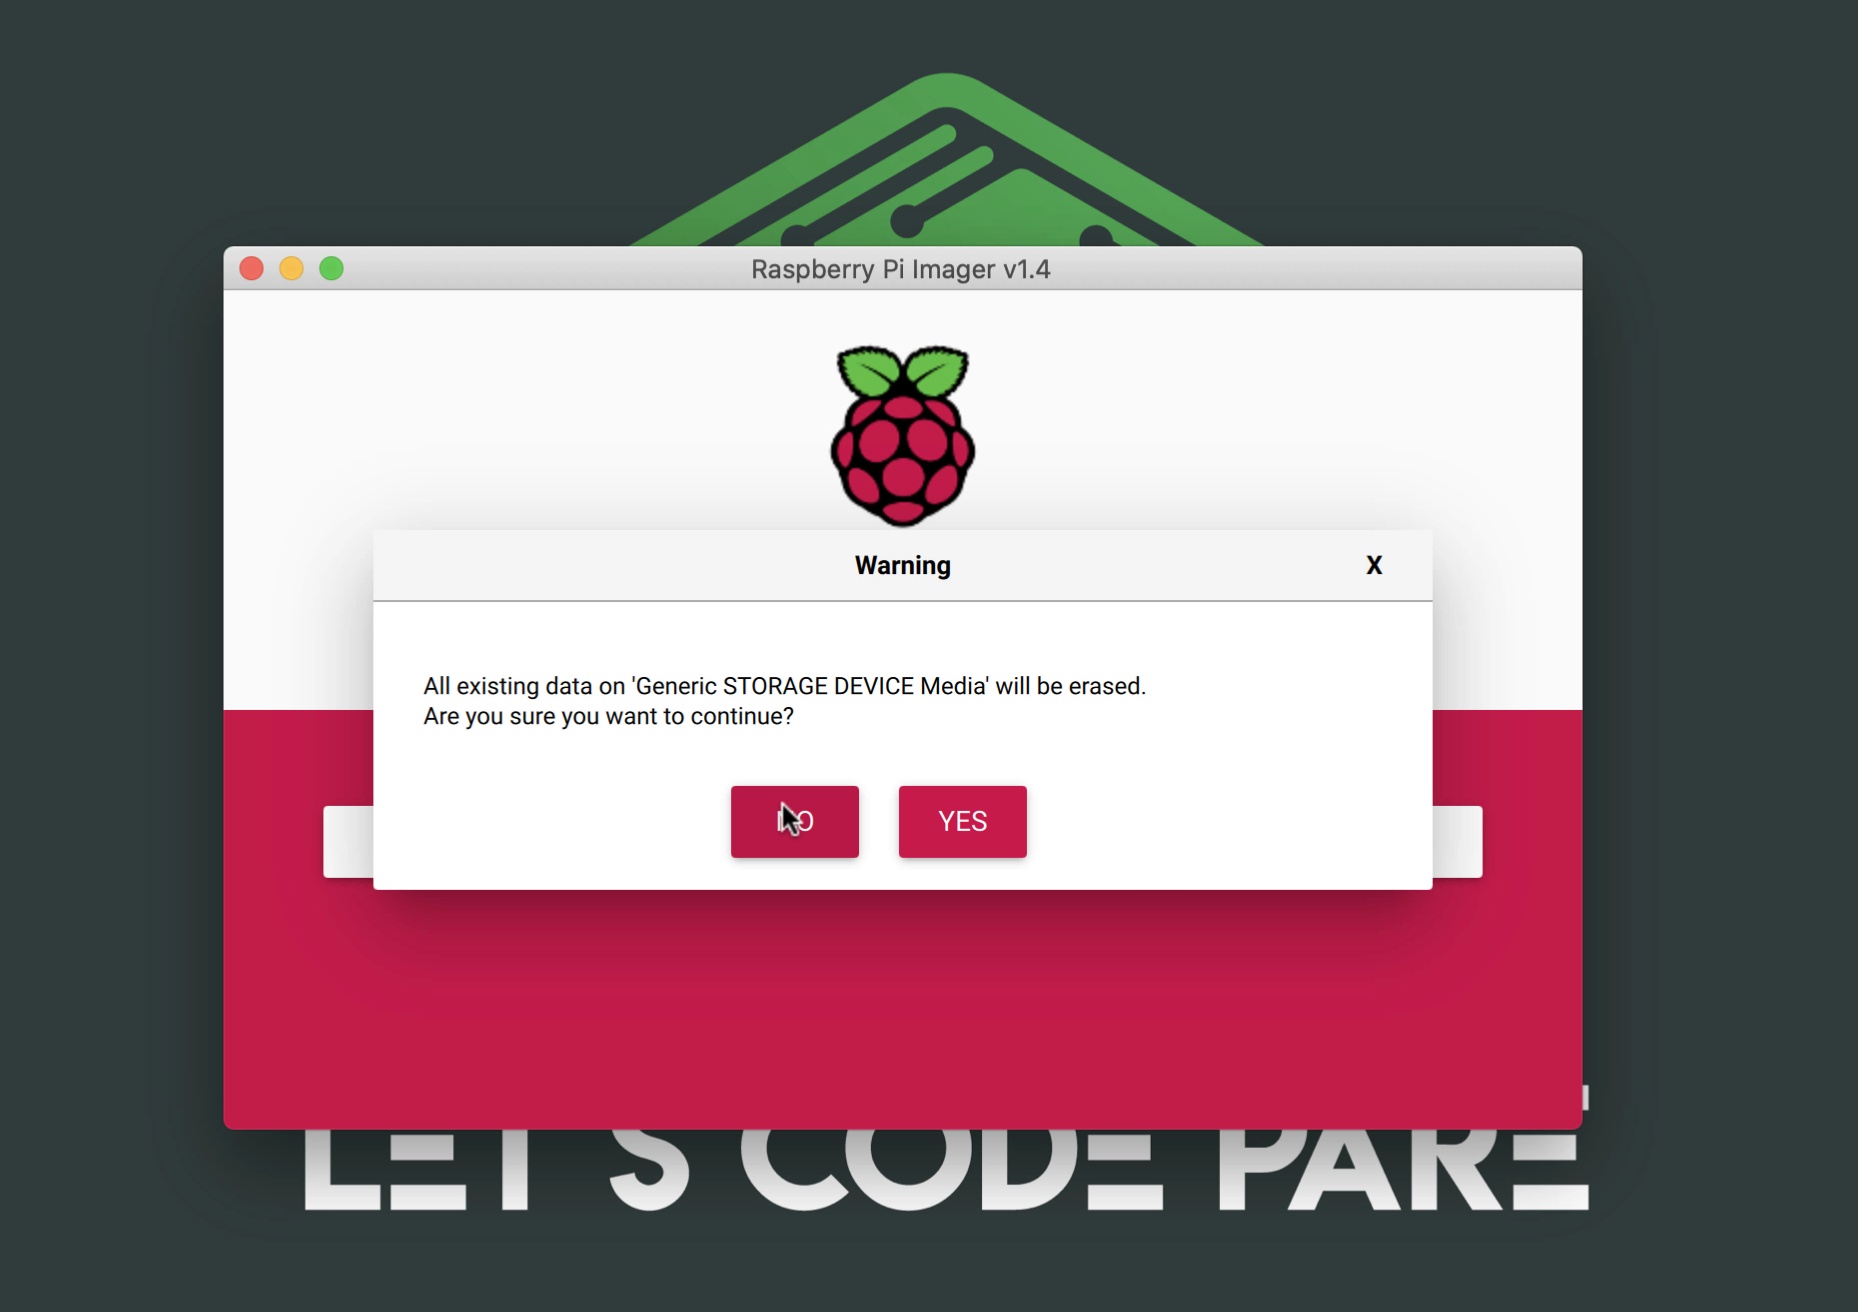
You may encounter, a notice before proceeding like this: "All existing data on your micoSD will be erased."
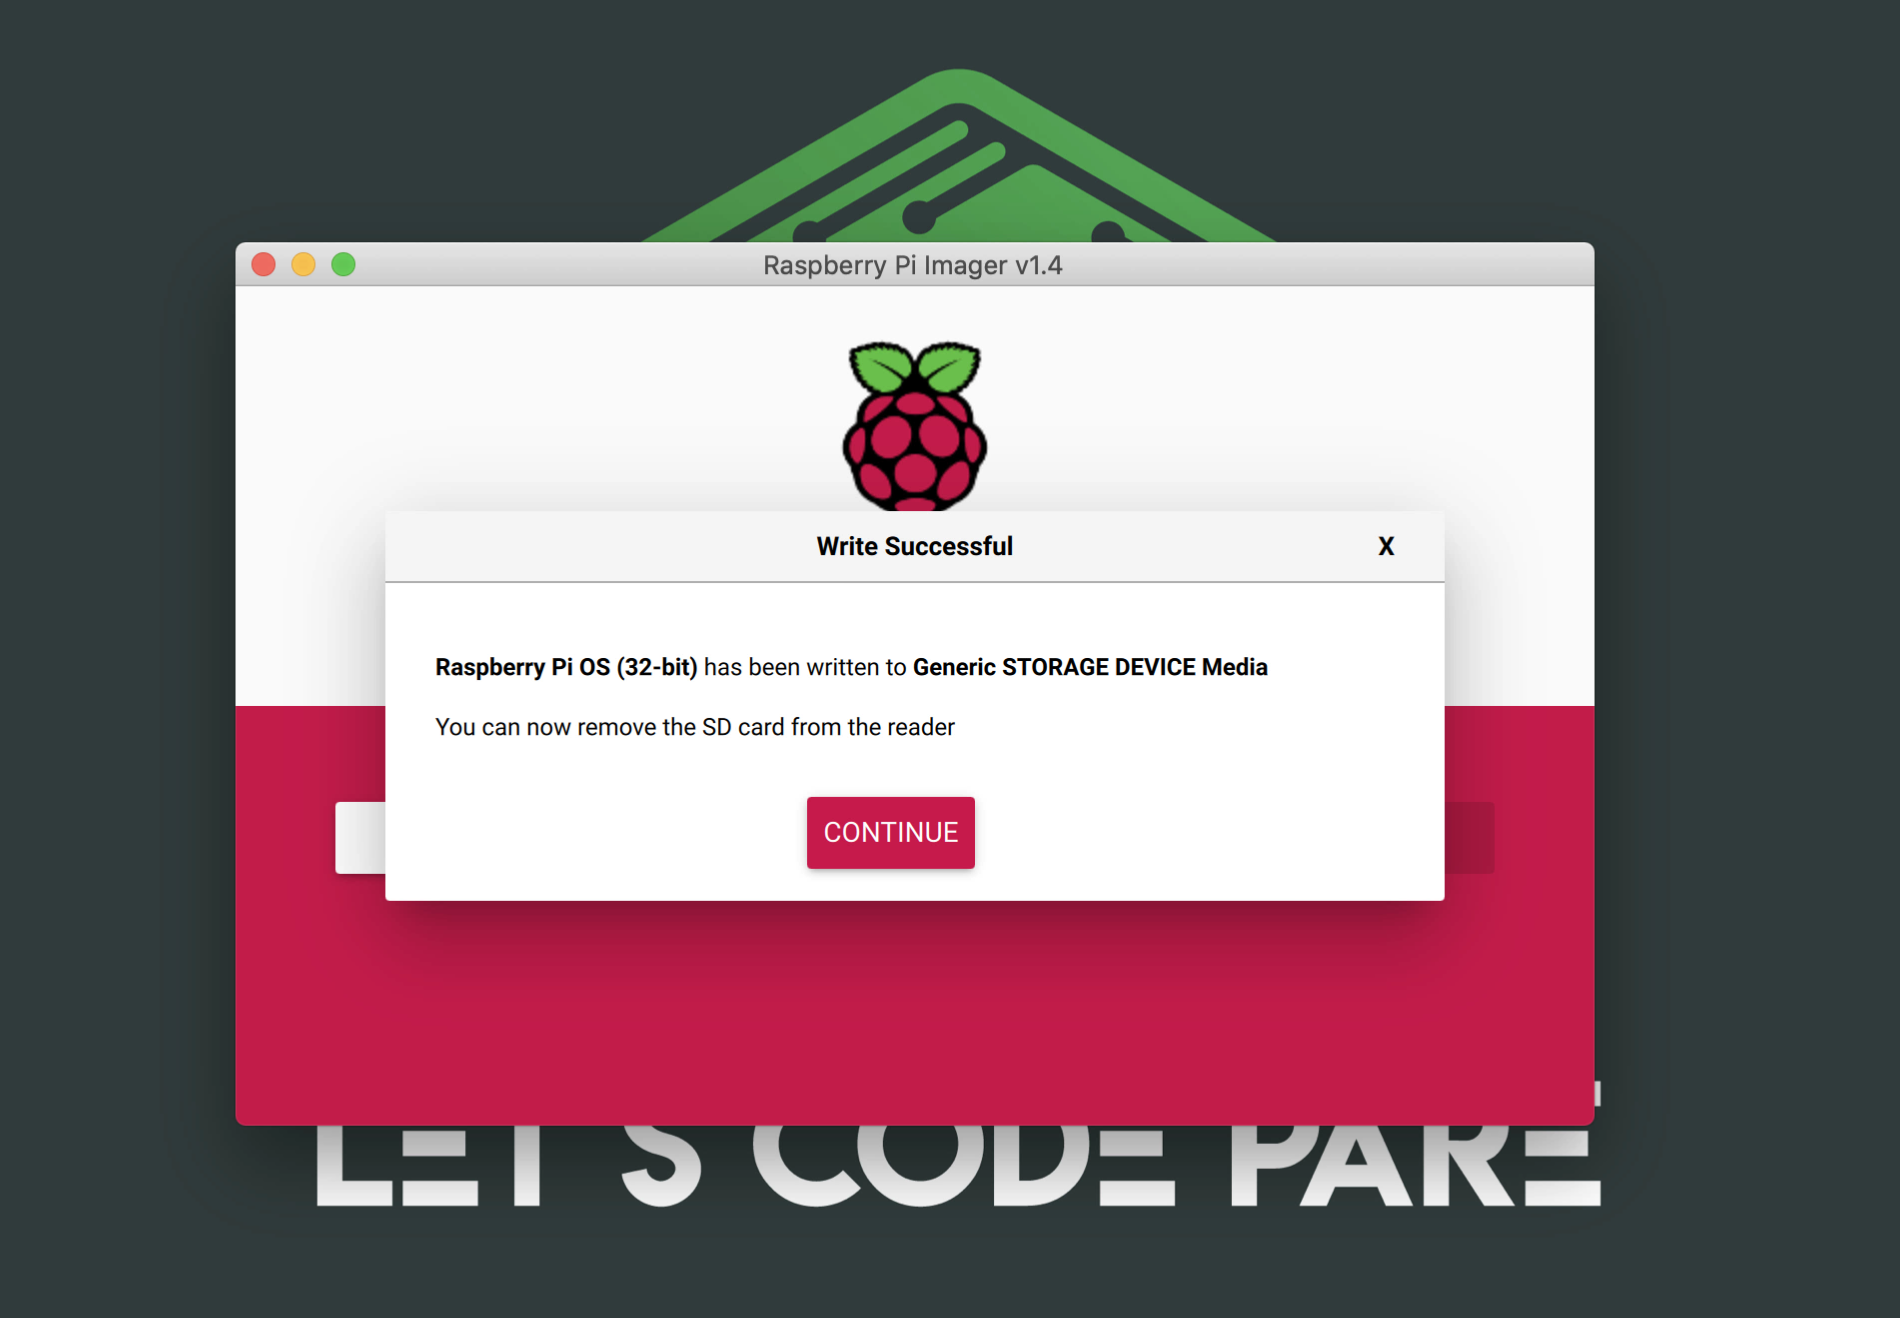
Tadaaa!!!, It's done. It's more simple using raspberry pi imager.
STEP 3: Enable SSH for Raspberry Pi 4 on Boot
Open your favorite terminal and go to your microSD folder. As for my microSD ill be using
cd /Volumes/boot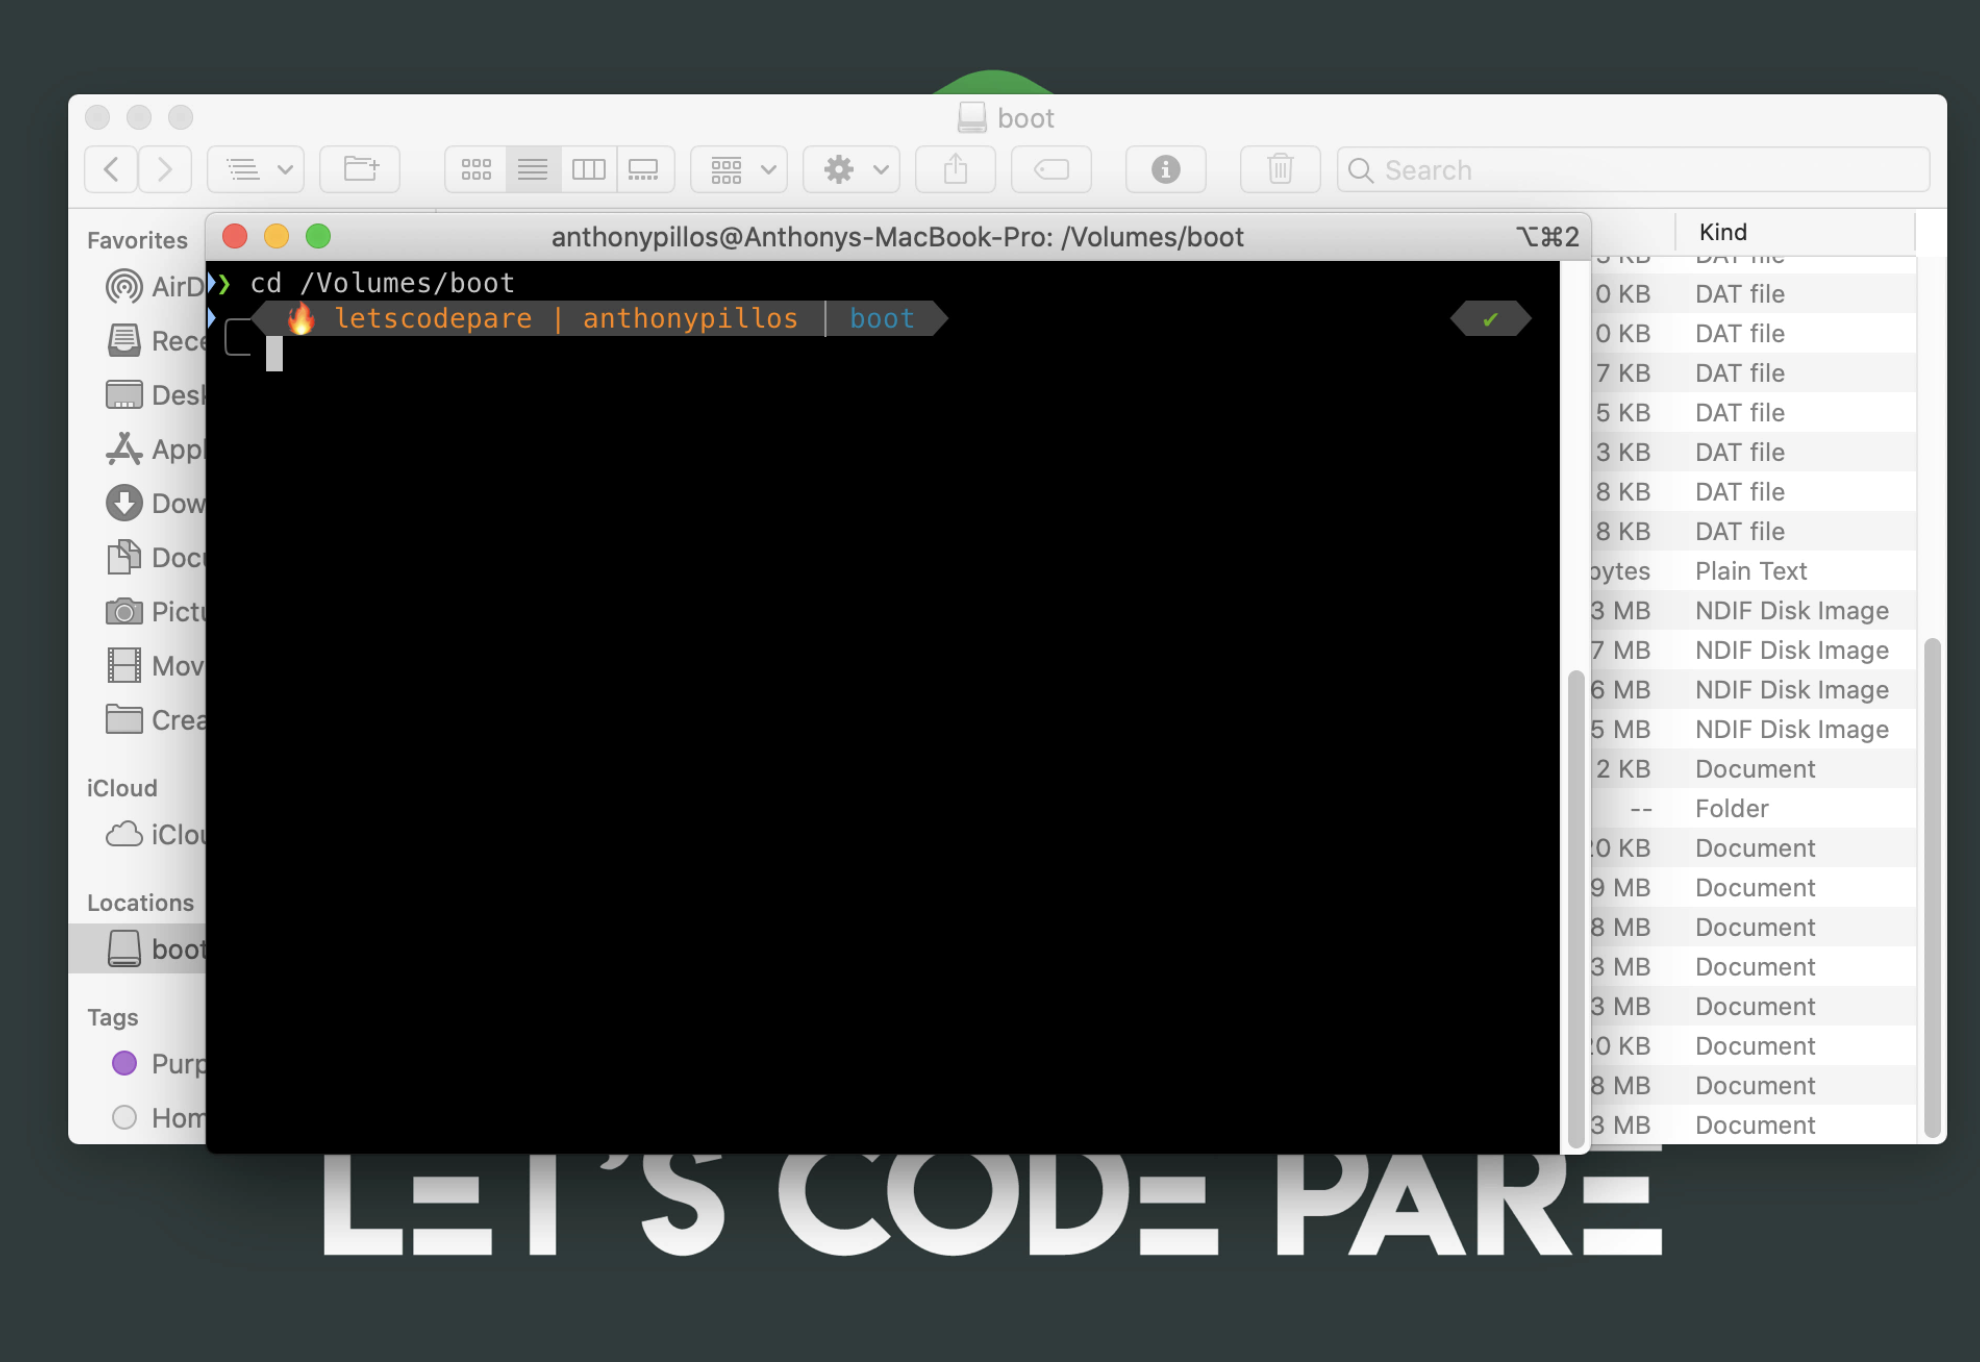
Create an empty text file named
ssh(without file extension) inside the root directory of your microSD card. Once you boot-up your raspberry pi it will automatically enable SSH (Secure Socket Shell), which allow you to remotely access your raspberry pi command line from your Mac / Windows Computer using your favorite SSH terminal such as PuTTY for windowsType in your command line:
touch ssh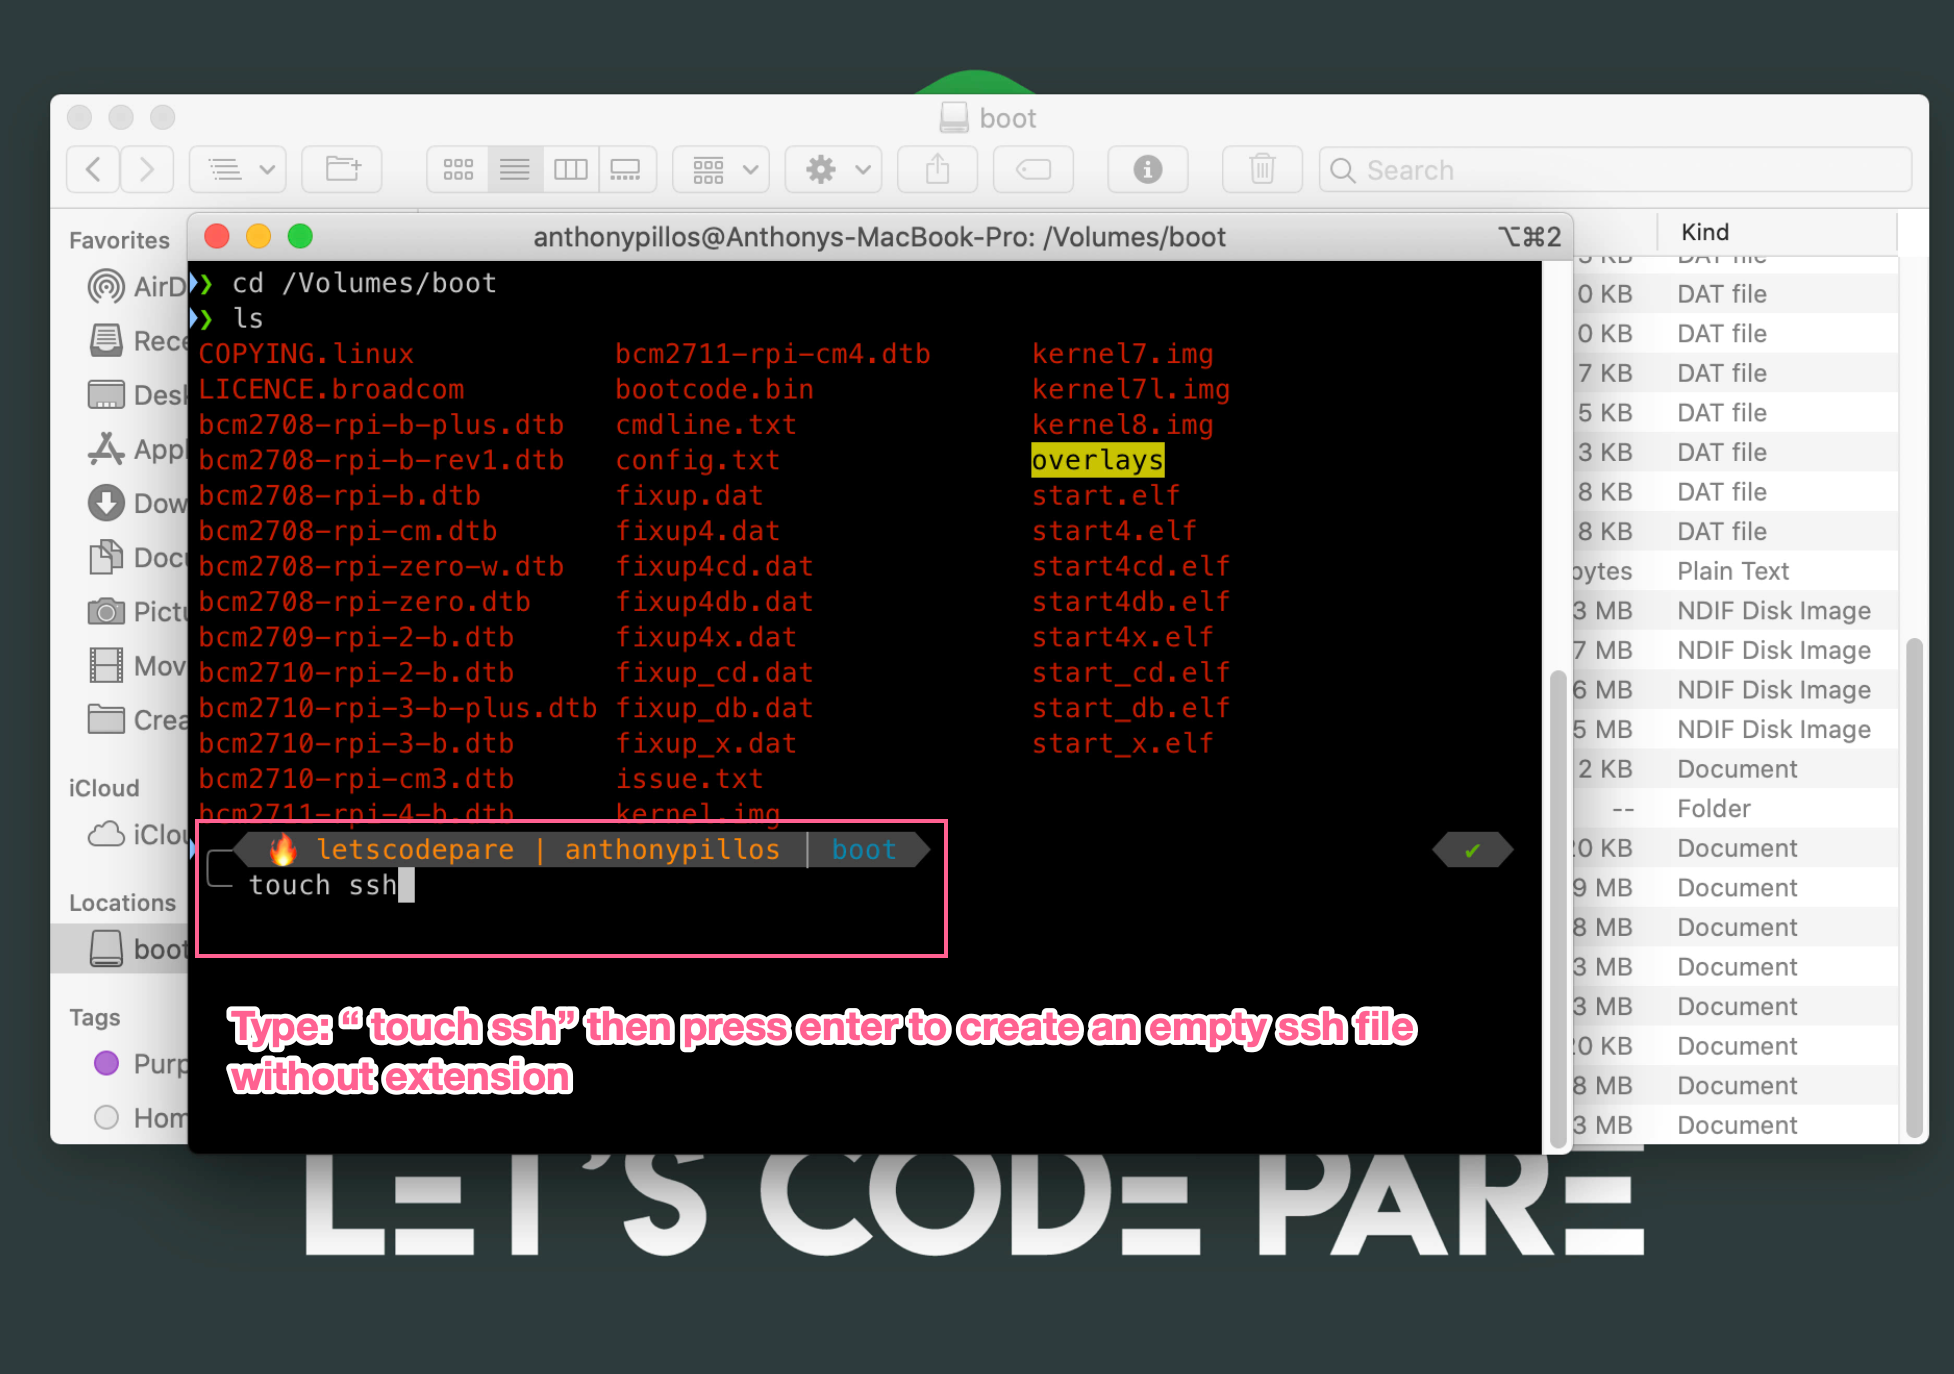
STEP 4: Enable a Headless Wi-Fi / Ethernet
Though you enable the SSH on boot, you need to connect your raspberry pi to your Wi-fi / Ethernet to give access to your network.
In this step, ill teach you on how to connect to your raspberry pi to your Wi-fi on boot-up.
Open up again your terminal, and create a file named "wpa_supplicant.conf" inside the root directory of your microSD.
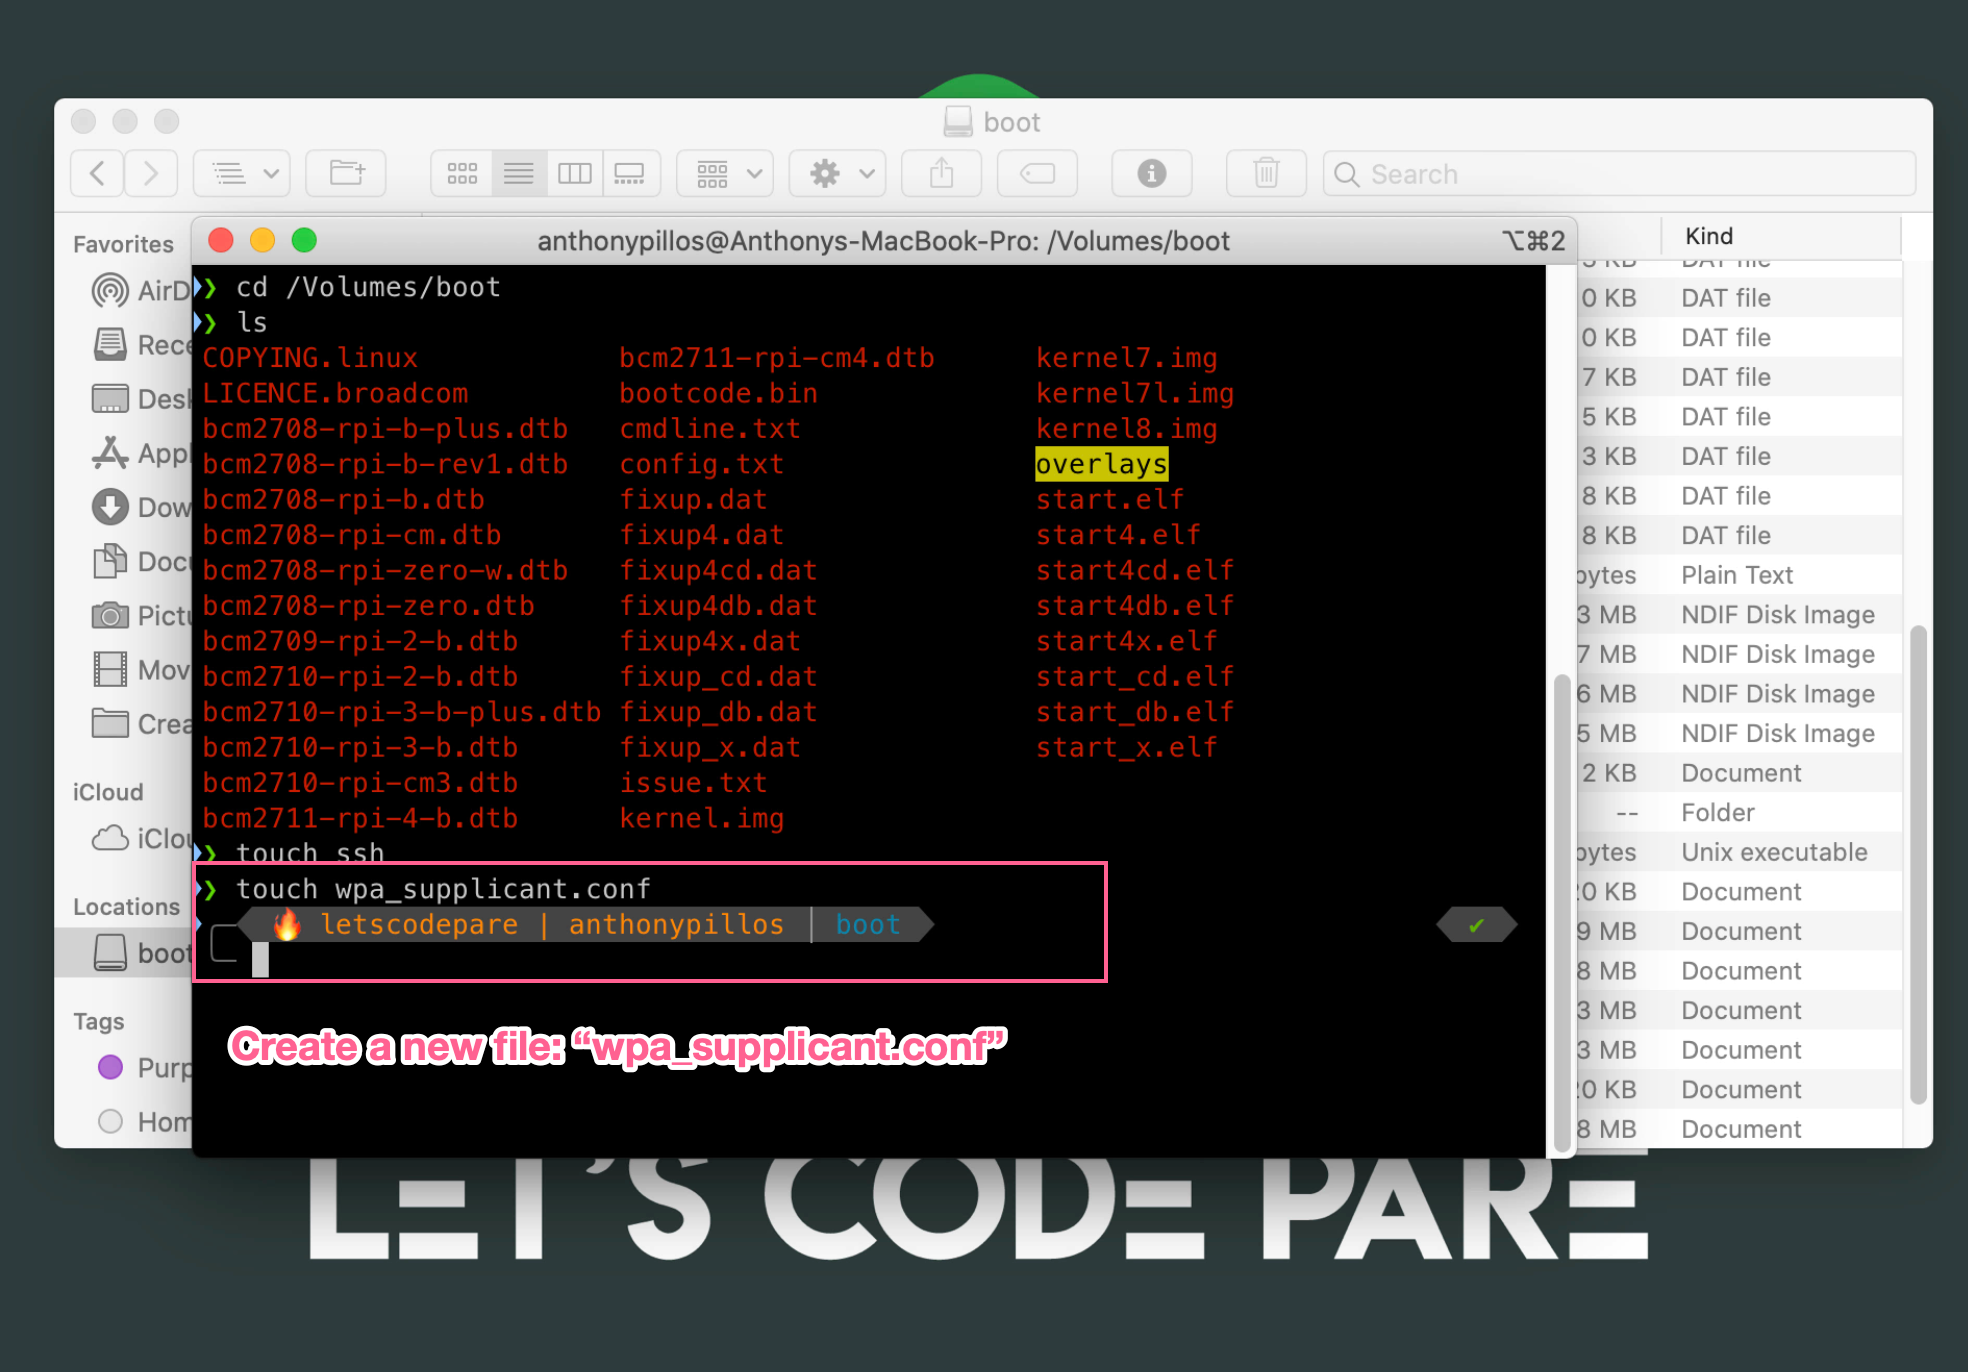
Copy the following text inside your wpa_supplicant.conf
ctrl_interface=DIR=/var/run/wpa_supplicant GROUP=netdev
update_config=1
country=PH

network={
    ssid="your_wifi_ssid"
    psk="wifi_password_here"
    key_mgt="WPA-PSK"
}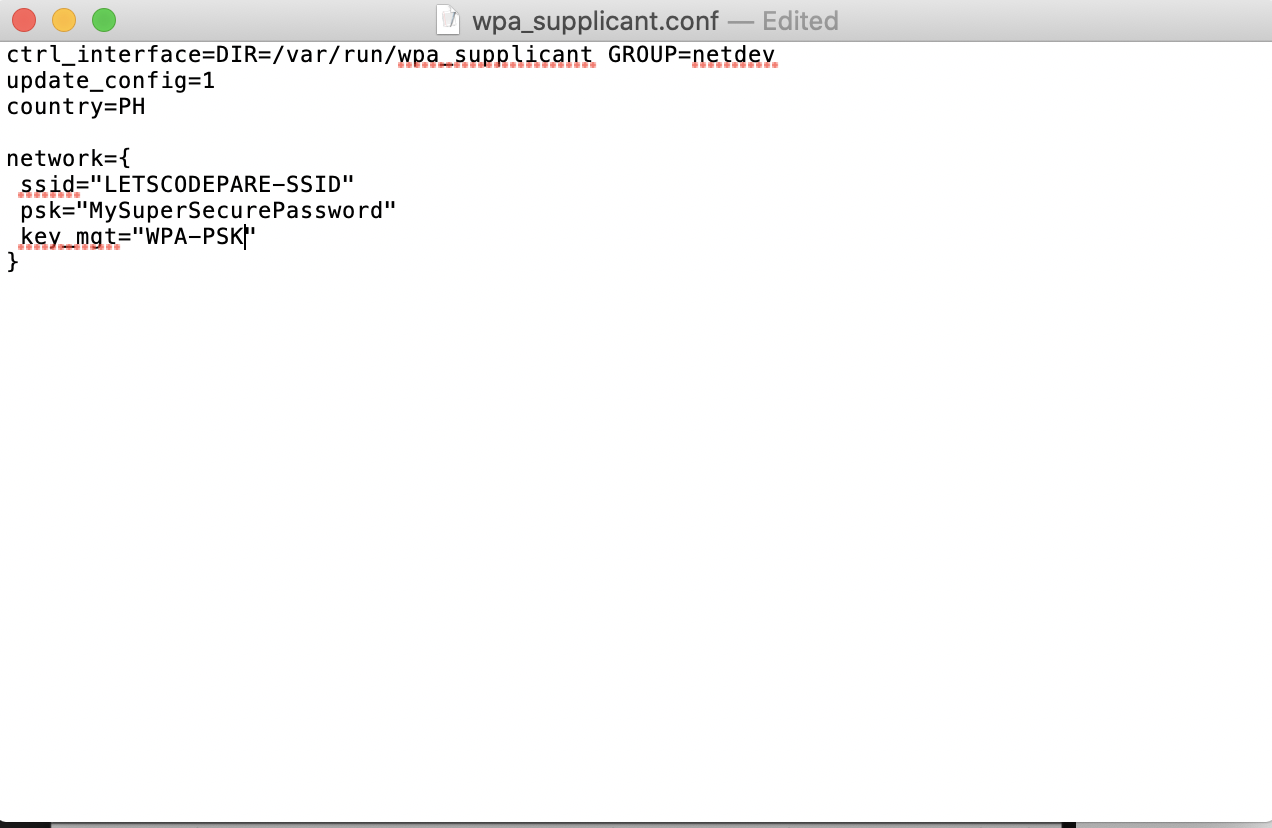
Change the country to your specification as for me, i'll be using "PH", then enter your SSID and Password of your Wi-fi. Upon boot up, your device will connect to your Wi-fi network.
In case, you want to use Ethernet, just plug your raspberry Pi directly to your wired network, then you can access it by its name raspberrypi.local without any problem.
STEP 5: Everything is setup, Let's Power up our Raspberry Pi 4.
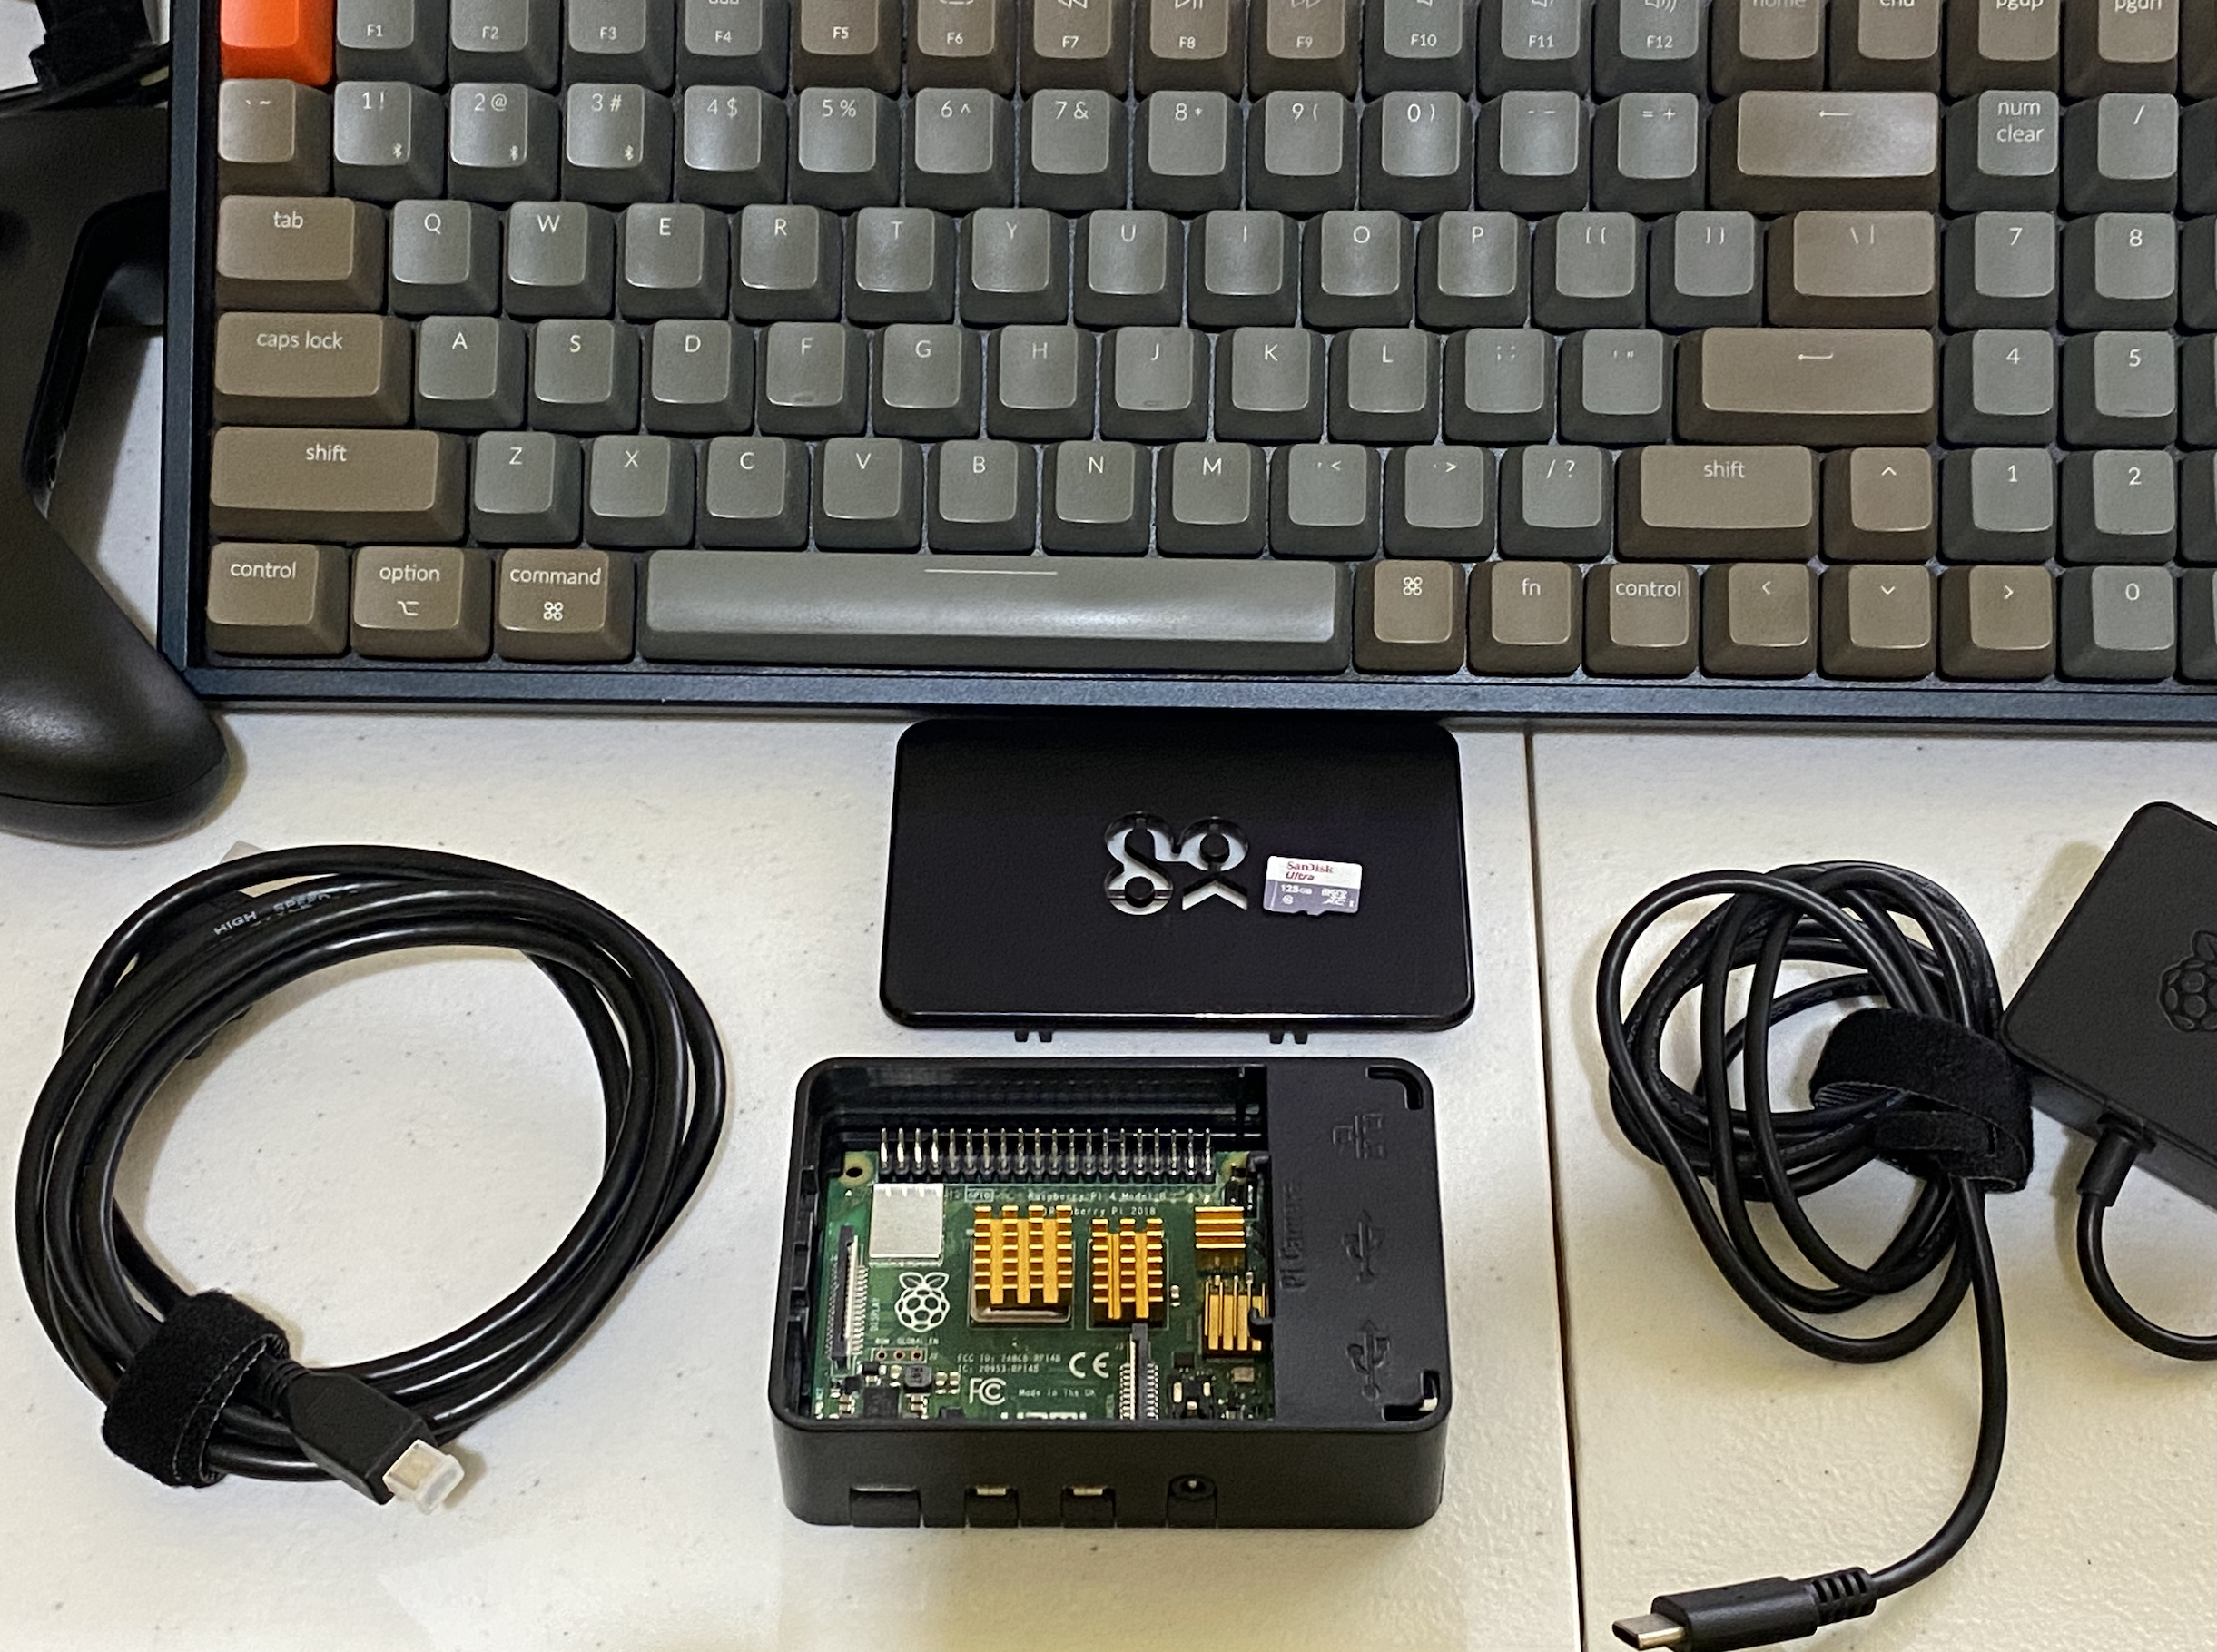
First thing to do, is to find the IP address that was assigned to your raspberry pi 4 by your Wi-fi Network.
To do that, you need to use a tool which scan your network and determine which IP address use by different devices connected to your network.
For this tutorial because i'm using mac, ill be using "nmap" tool.
Open your terminal, and type the following code.
sudo nmap -sP 192.168.1.0/24Once the network scanning is done, you should see your raspberry pi assigned IP Address, which in my case it's
192.168.1.8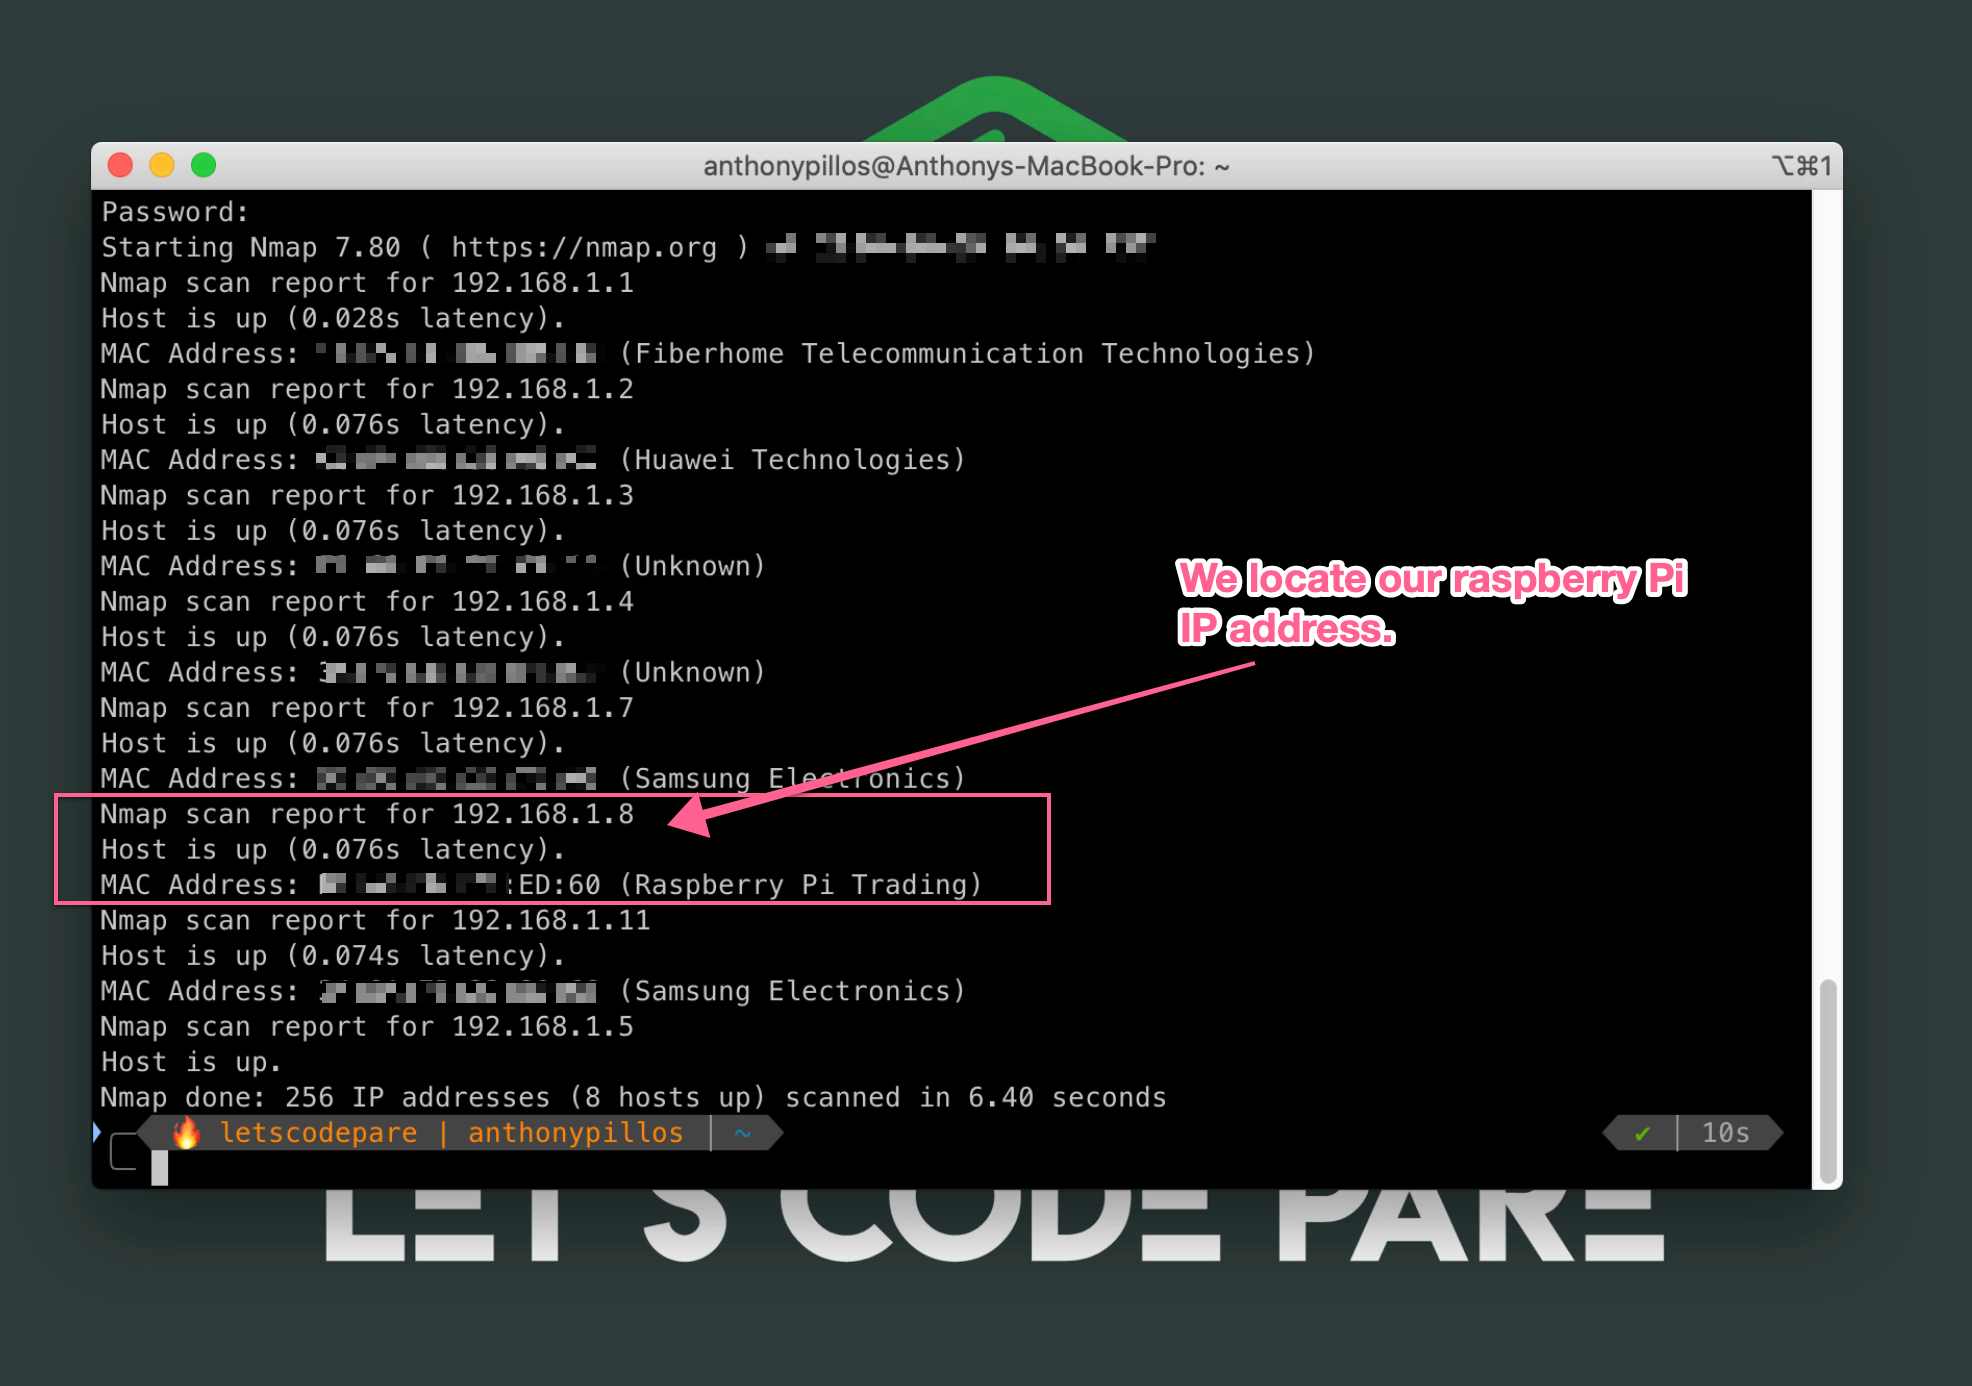
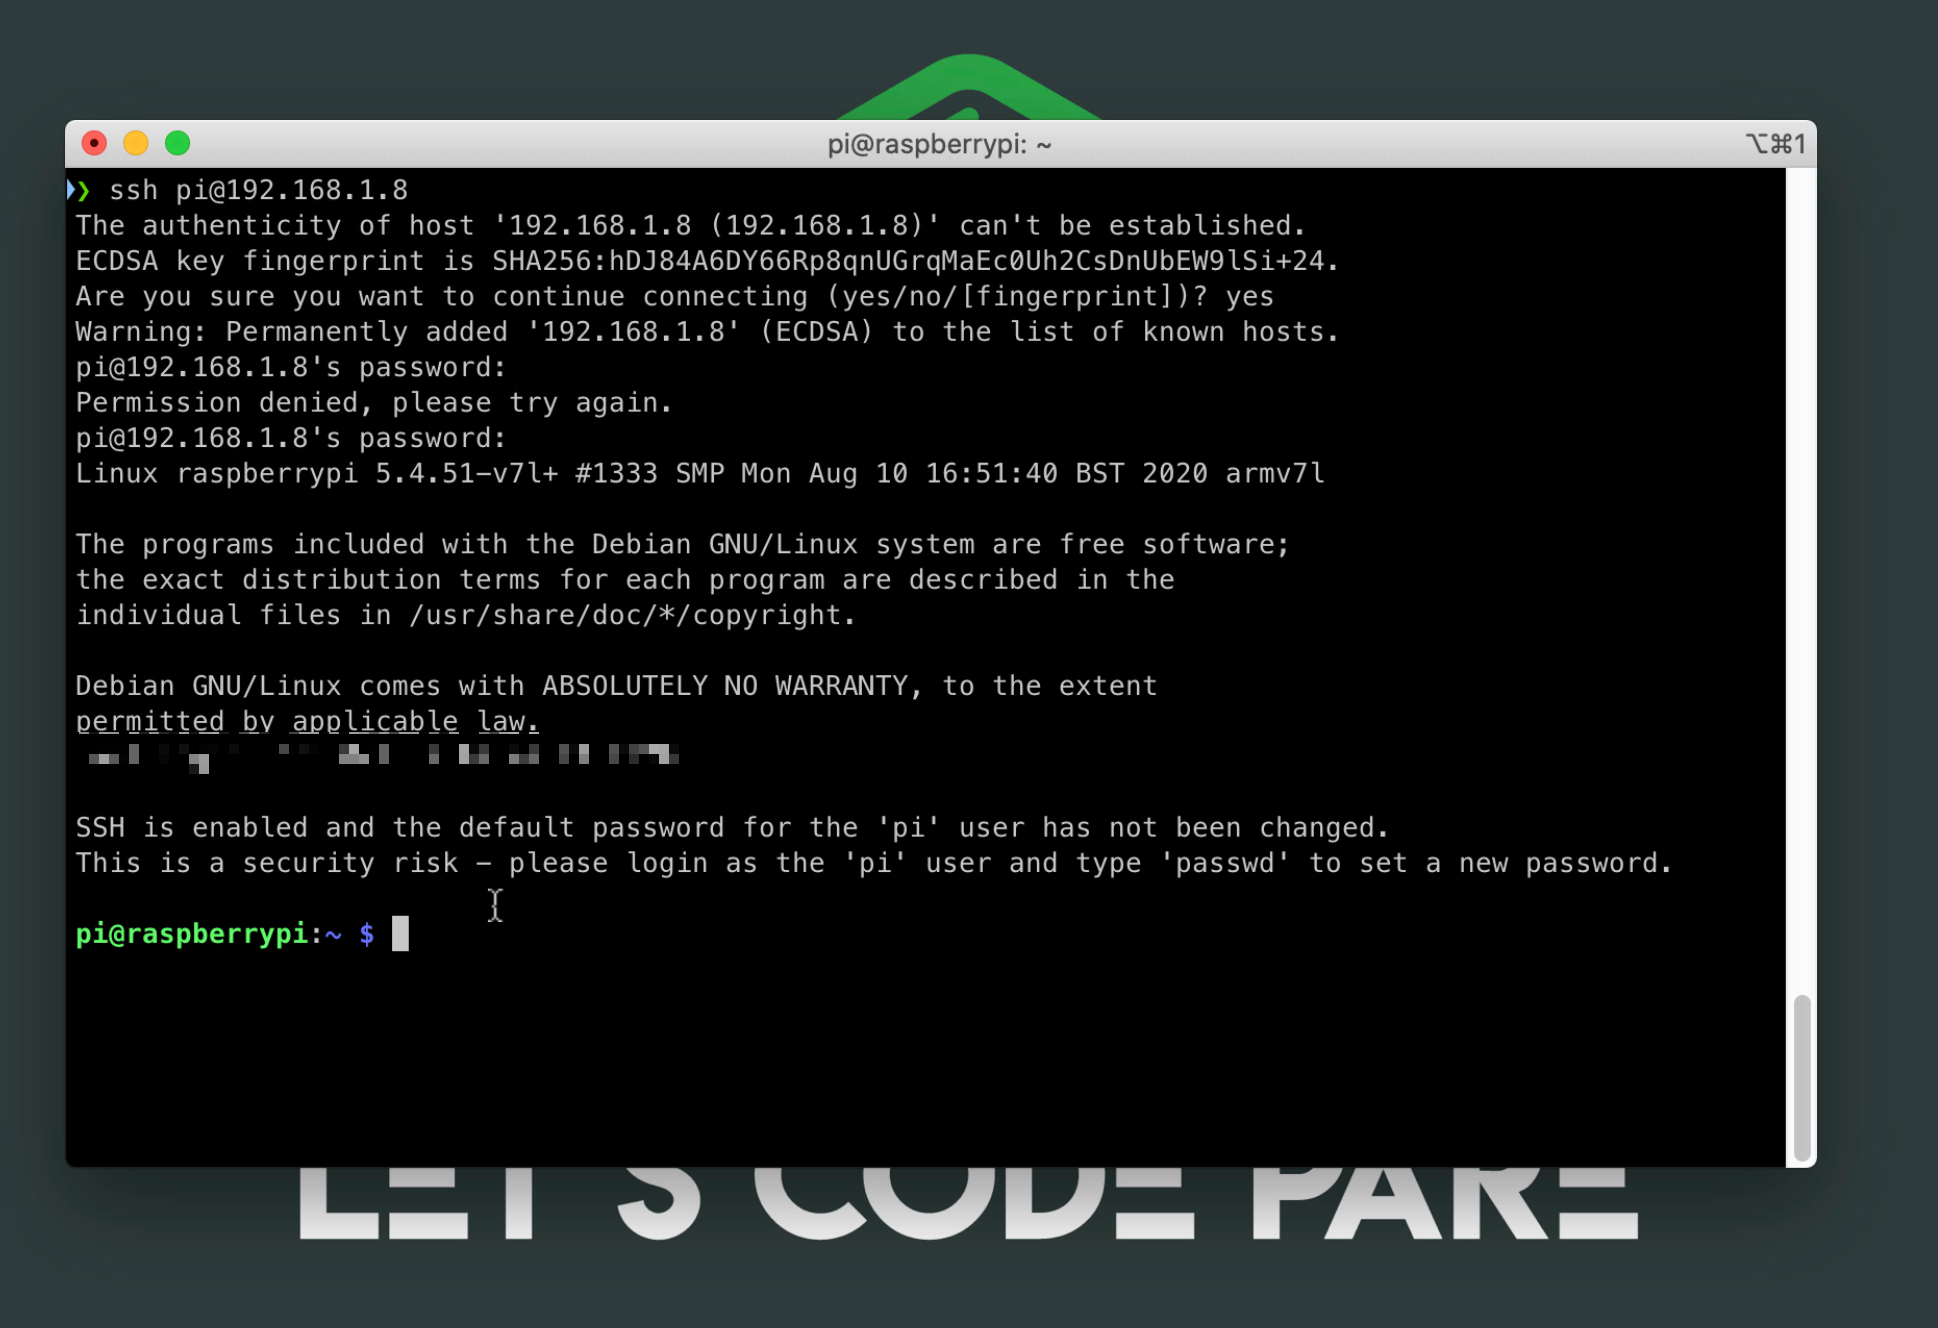
Login to your raspberry pi device using your ssh with the ip address assigned using the following code.
ssh pi@192.168.1.8By default settings, the password would be just raspberry
STEP 6: Connect using VNC
Now that you know how to
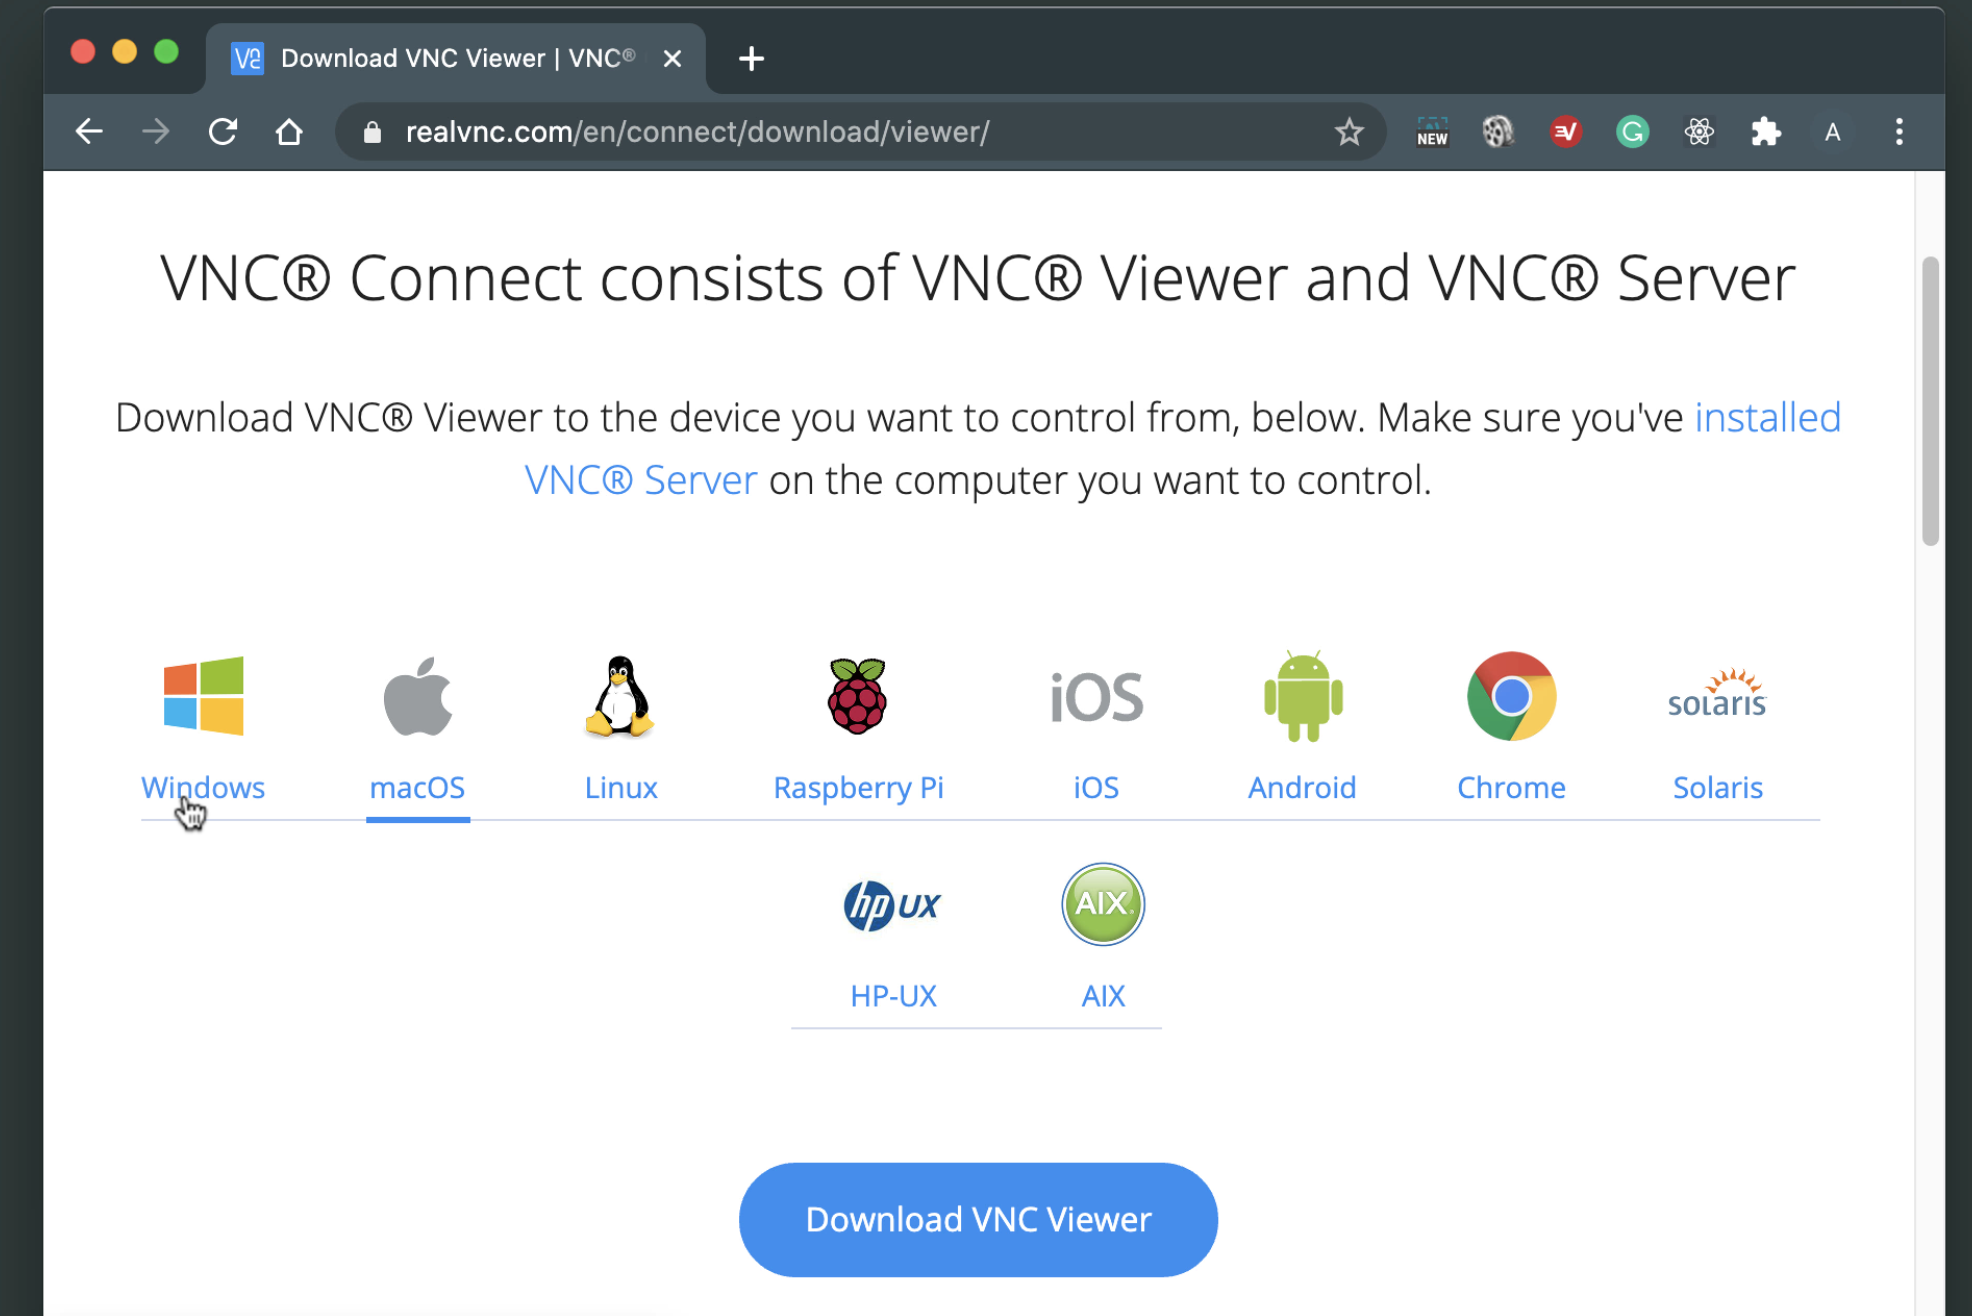
sshin your device, we are going to access the graphical user interface or the desktop mode of your Raspberry. We are going to use VNC Viewer.You can download it from this link VNC Viewer
While you are connected to your raspberry pi terminal, let’s run the following commands.
#Restart VNC Server each time the system is booted using systemd:

sudo systemctl enable vncserver-x11-serviced.service
#Start VNC Server on a Linux system using systemd: sudo systemctl start vncserver-x11-serviced.serviceOpen your vnc viewer and enter the IP address with the username and password of your raspberry pi.
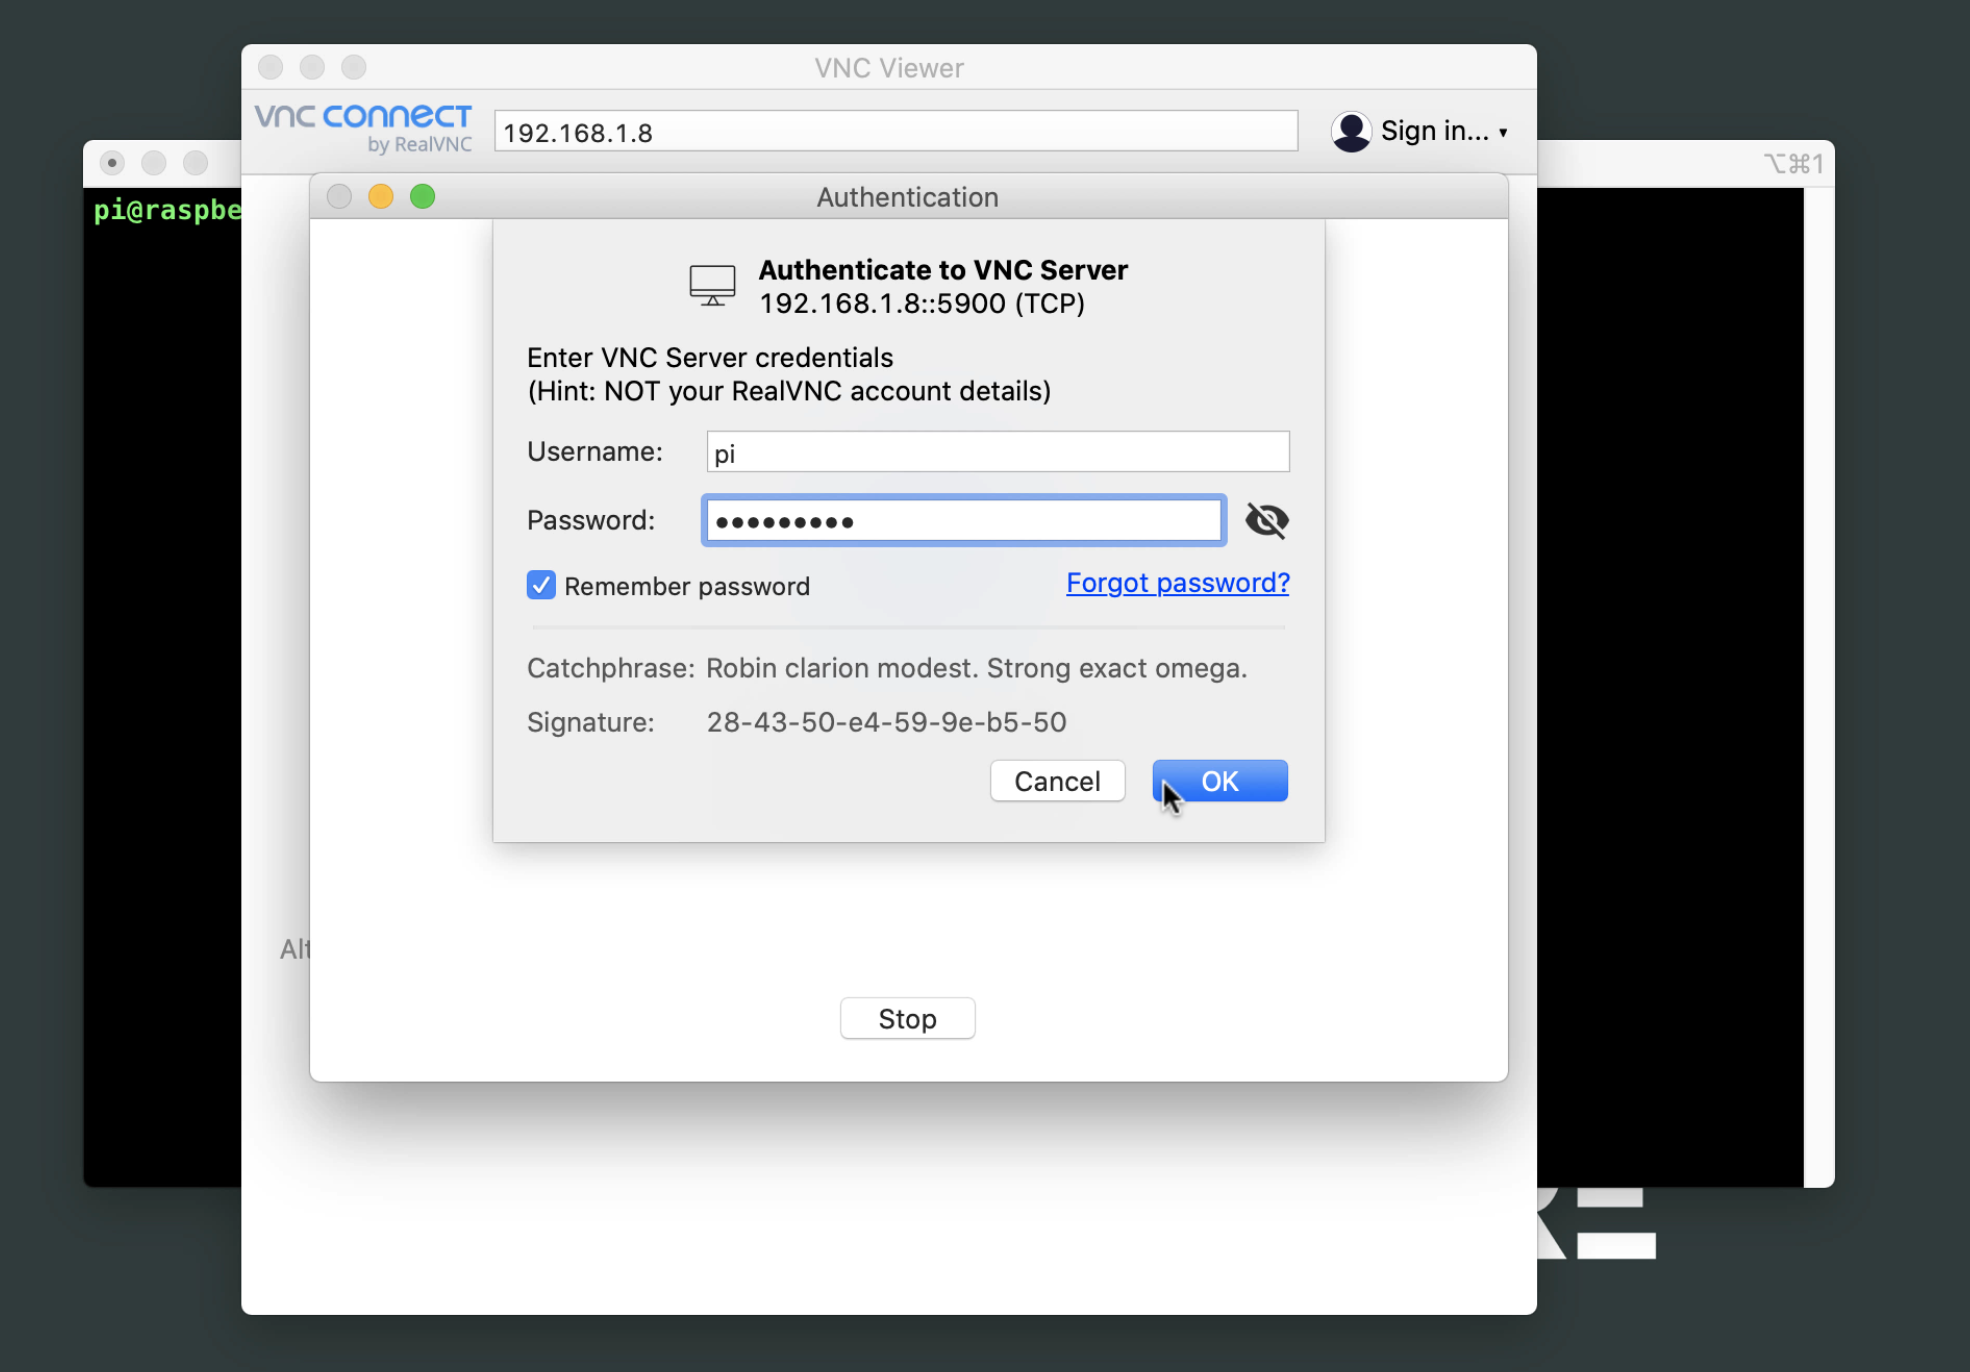
After successfully login, you should see the desktop gui of your RPI4.
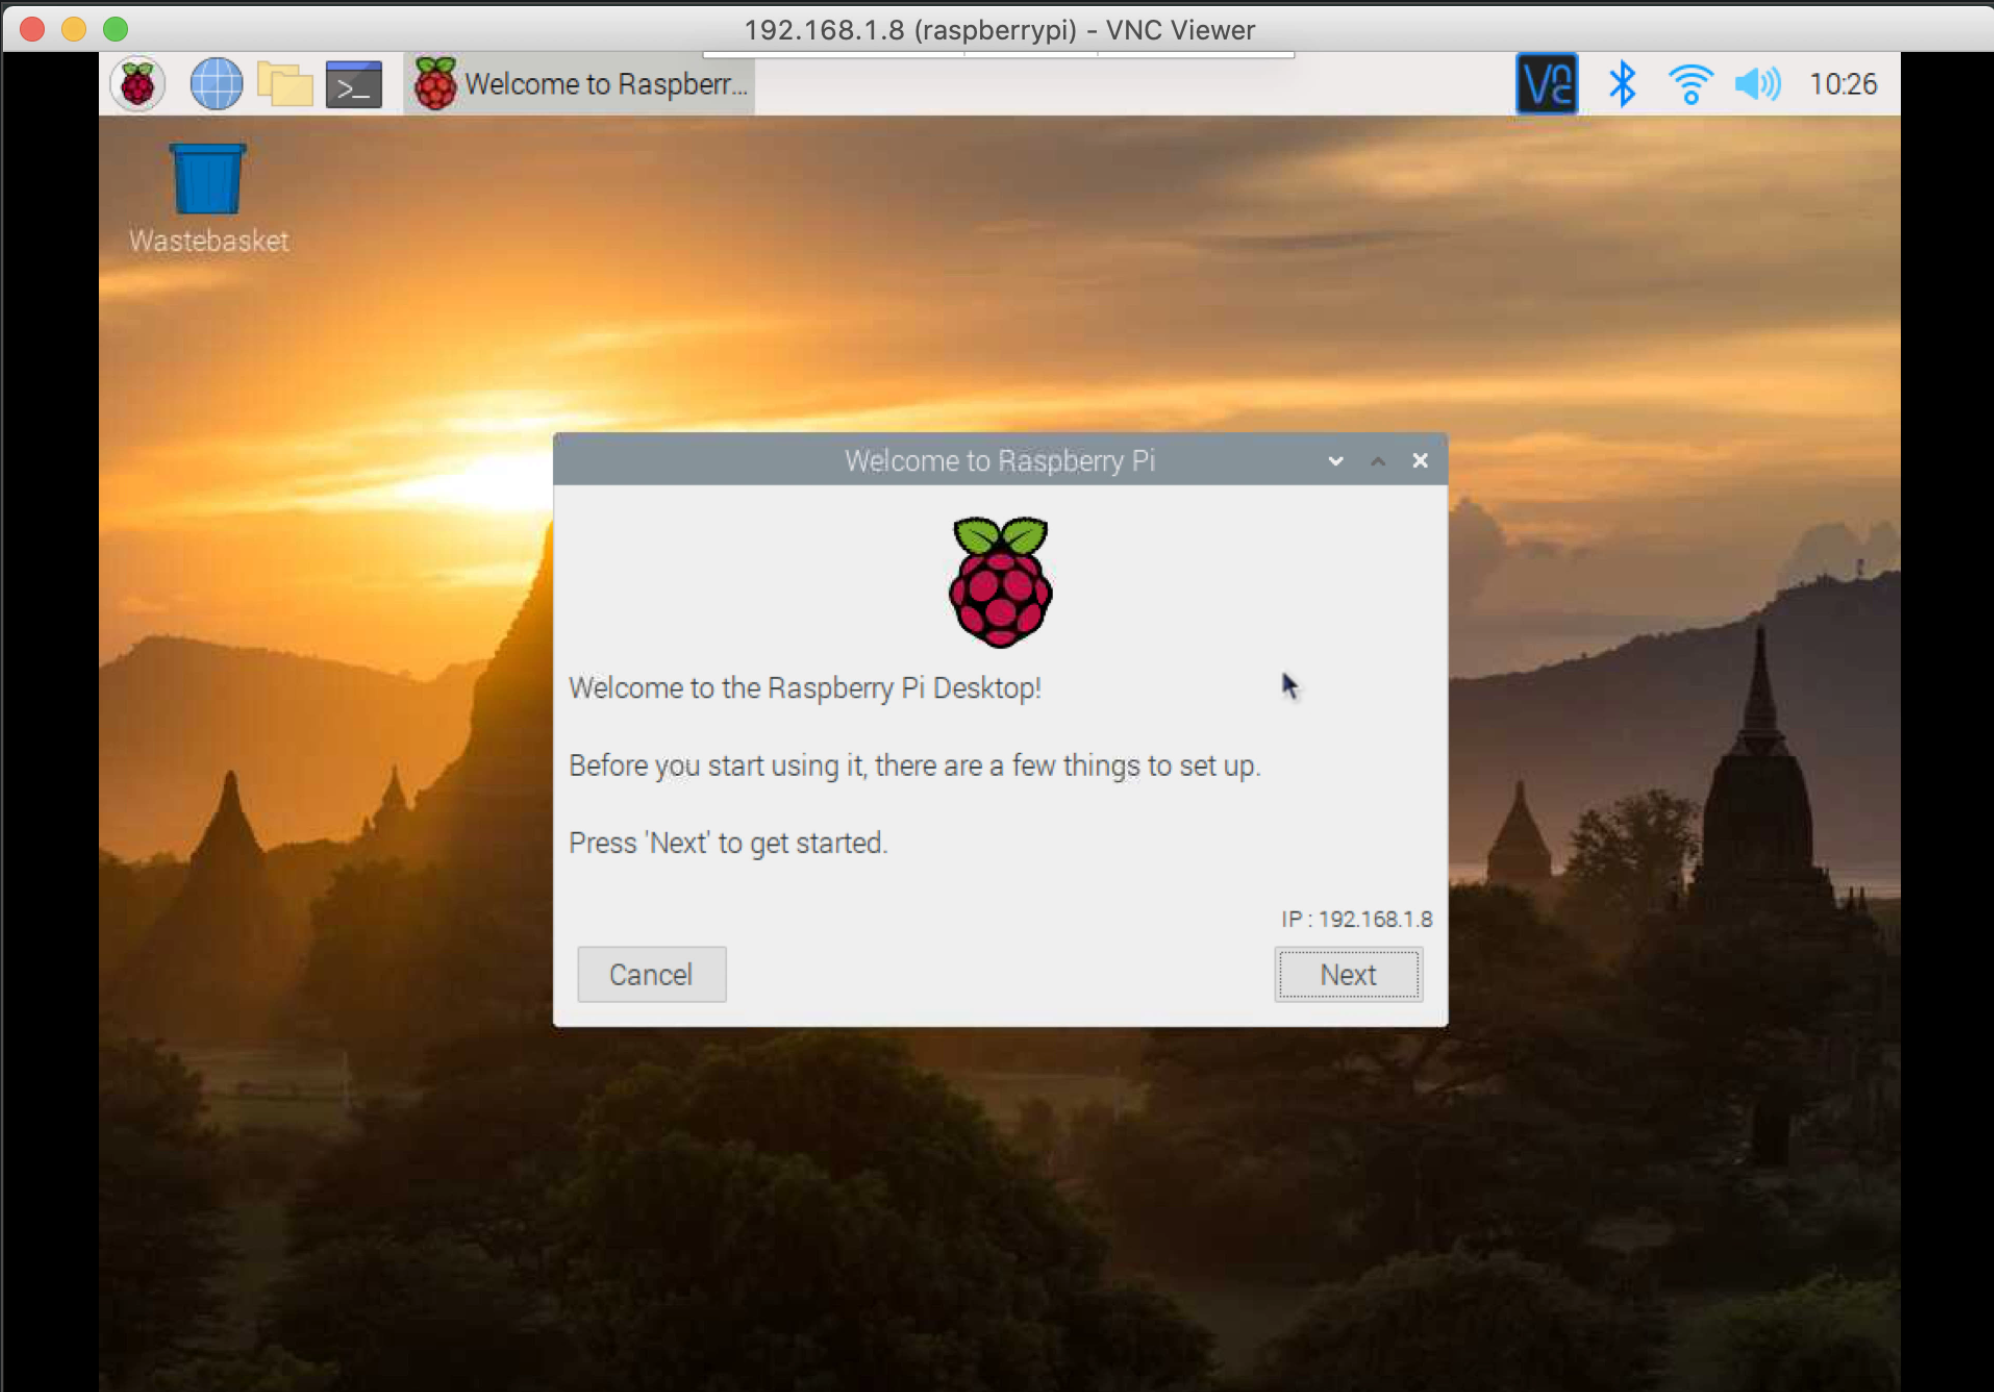
Voila!!!
I hope you enjoy our tutorial, Let me know incase you encounter any error I would love to answer that. Don't forget to subscribe to my Youtube Channel at Let's Code Pare Youtube Channel

Next Tutorial
In this article, we are going to solve the issue with regard to the target class that does not exist in laravel. Solution for Target class [] does not exist in Laravel
Voila!!!
I hope you enjoy our tutorial, Let me know incase you encounter any error I would love to answer that. Don't forget to subscribe to my Youtube Channel at Let's Code Pare - Youtube Channel

